
.png)


.jpg)


.webp)
.webp)
.webp)
.webp)
.webp)


.webp)


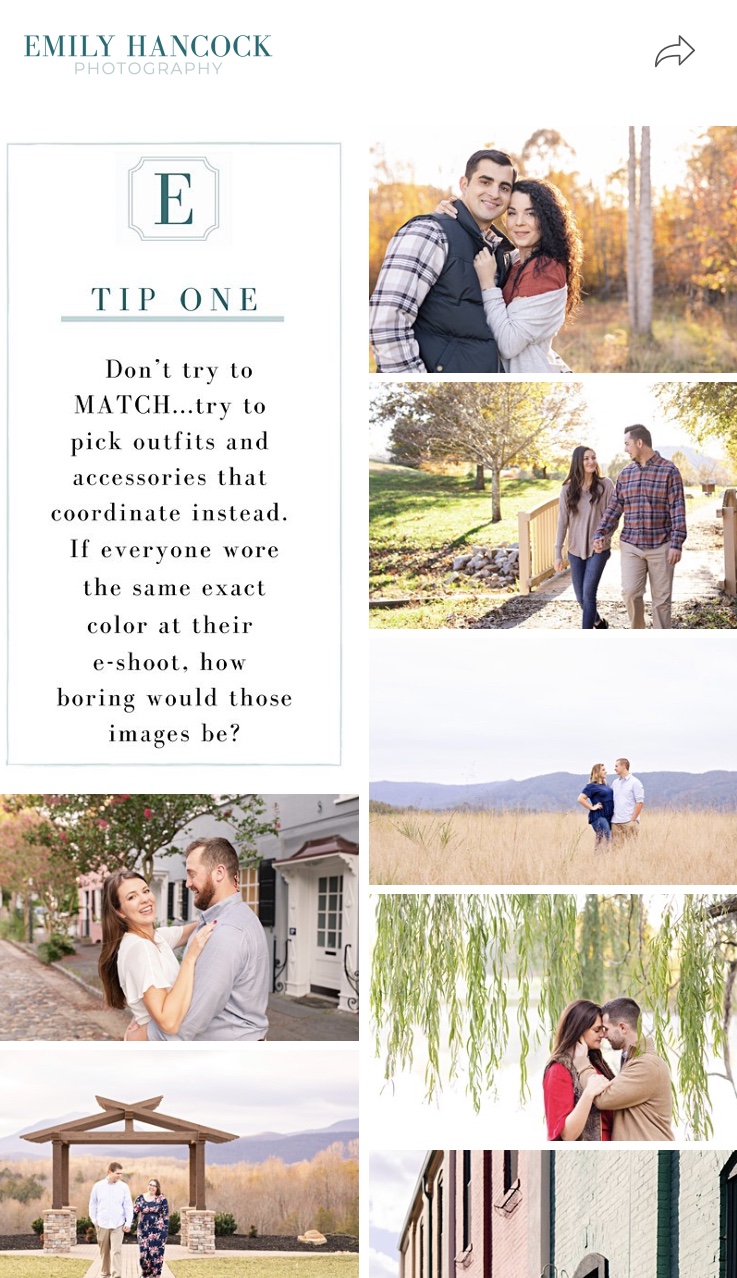
uring this off-season, I wanted to work on elevating my brand and find new ways to serve my couples. When CloudSpot came out with their Mobile App this past year, I have to admit, I was OBSESSED (and still am!). CloudSpot’s Mobile Apps actually inspired me to create this new and exciting marketing tool for my business. Once I finished it, I was so excited to share this Engagement Session App with my fellow creatives in the Katelyn James Education Facebook group. I am so glad I did because everyone LOVED it!!
Today, I thought I would share how I created this CloudSpot app in just 5 easy steps.
Step 1: Gather up your list of Engagement Session tips
I used tips from an email template of mine and created a few graphics with the free version of Canva. Make sure to include your branding on the graphics in some way so that it looks like your business! I would also encourage you to use the Canva template size for mobile devices so they will be the perfect resolution. When you are done, export them as a PNG.
Pro tip: Make sure you include one graphic with information about your services and include a photo of you or your team!
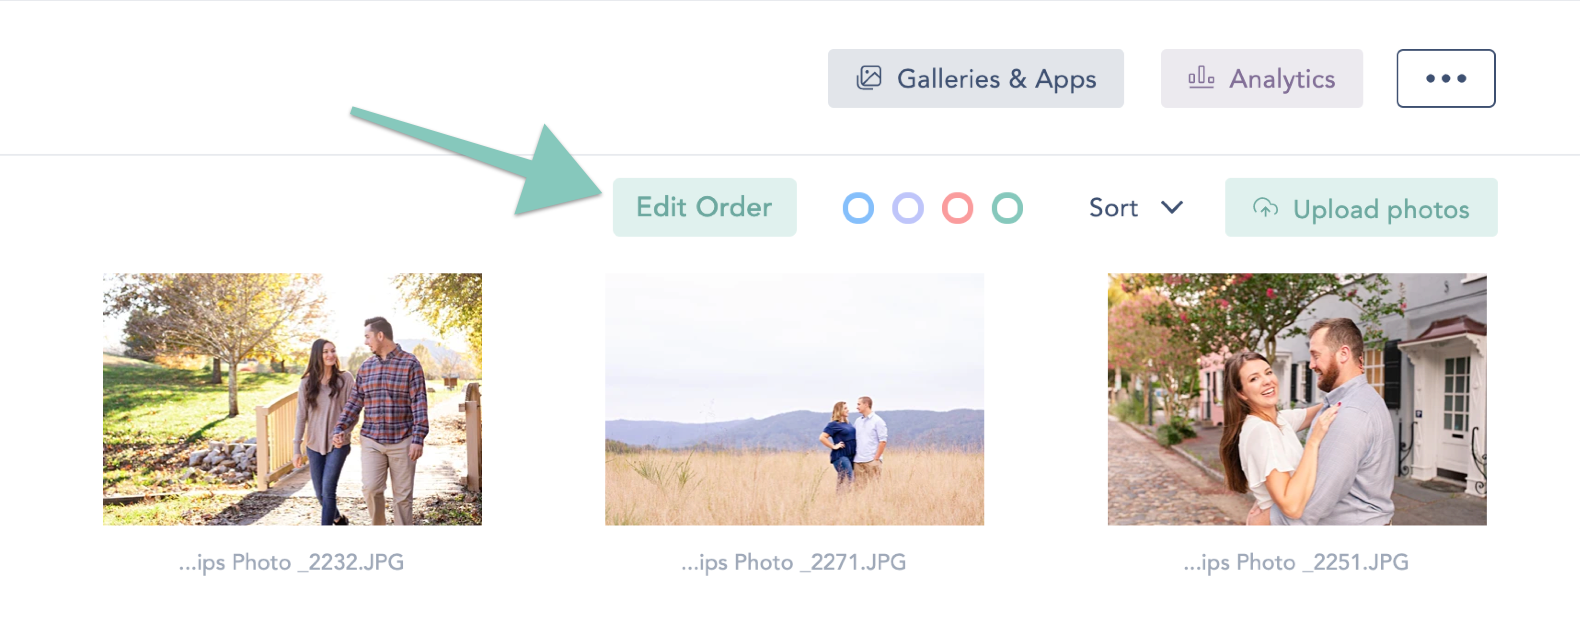
Step 2: Upload your images and graphics to CloudSpot
Make sure you select portfolio images that are an example of each tip. Once everything is uploaded, you can arrange them easily within the gallery to flow nicely. Organize the photos with each tip so that your clients will easily get inspired!
Pro tip: Before sharing the link, download the app to make sure it looks good scrolling on your phone!
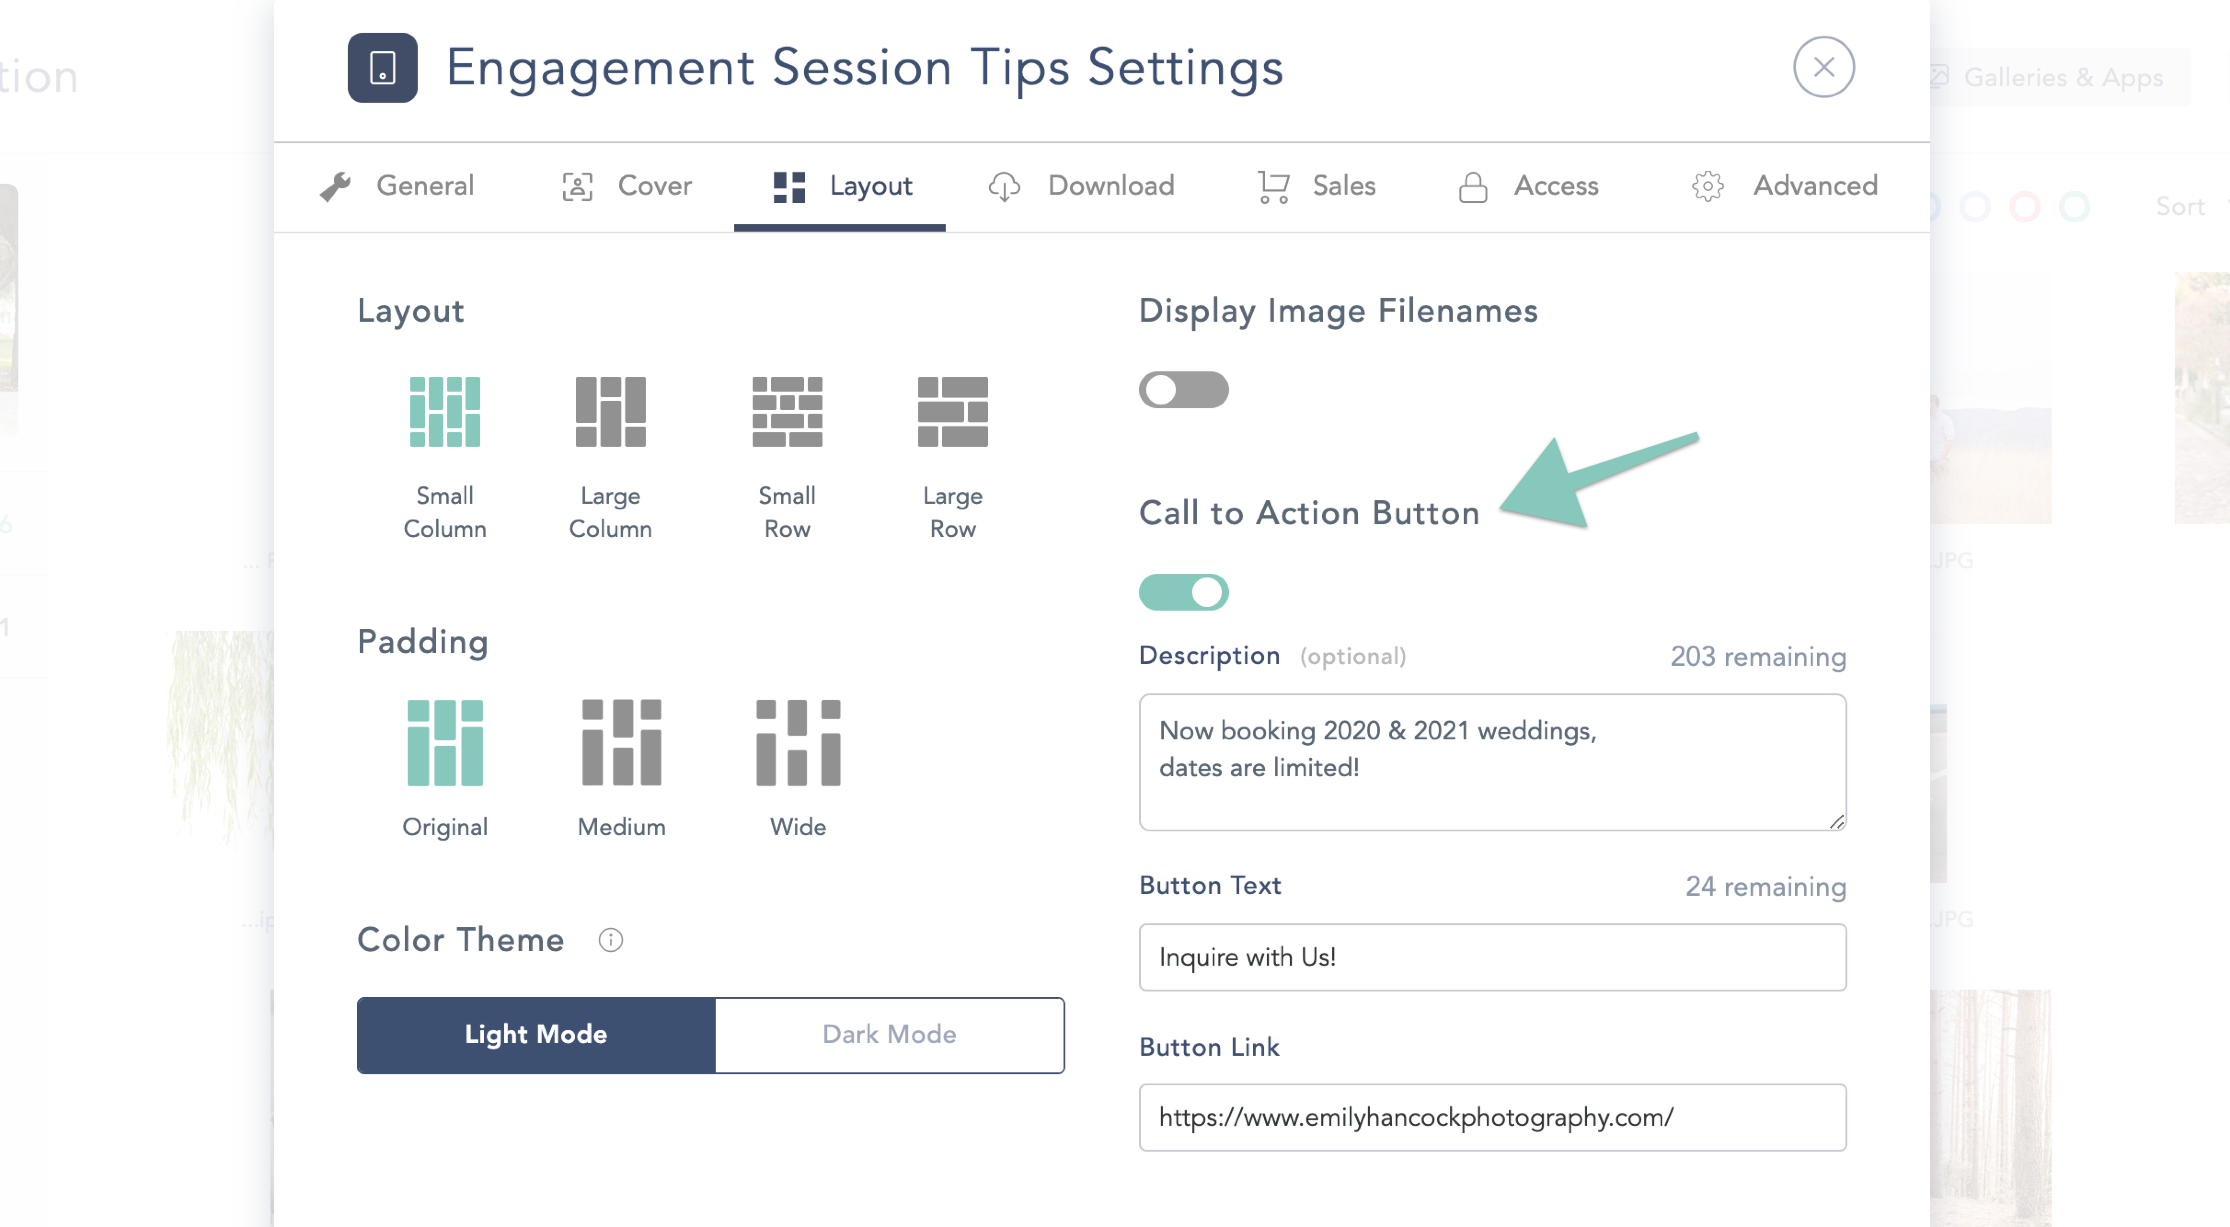
Step 3: Set up the gallery
CloudSpot has so many ways for users to customize galleries; you can really be creative with this! I chose to include a Call to Action button with this Mobile App to help market to potential couples. The Call to Action button is displayed at the end of the app and encourages couples to check out my website to learn more about our wedding photography experience!
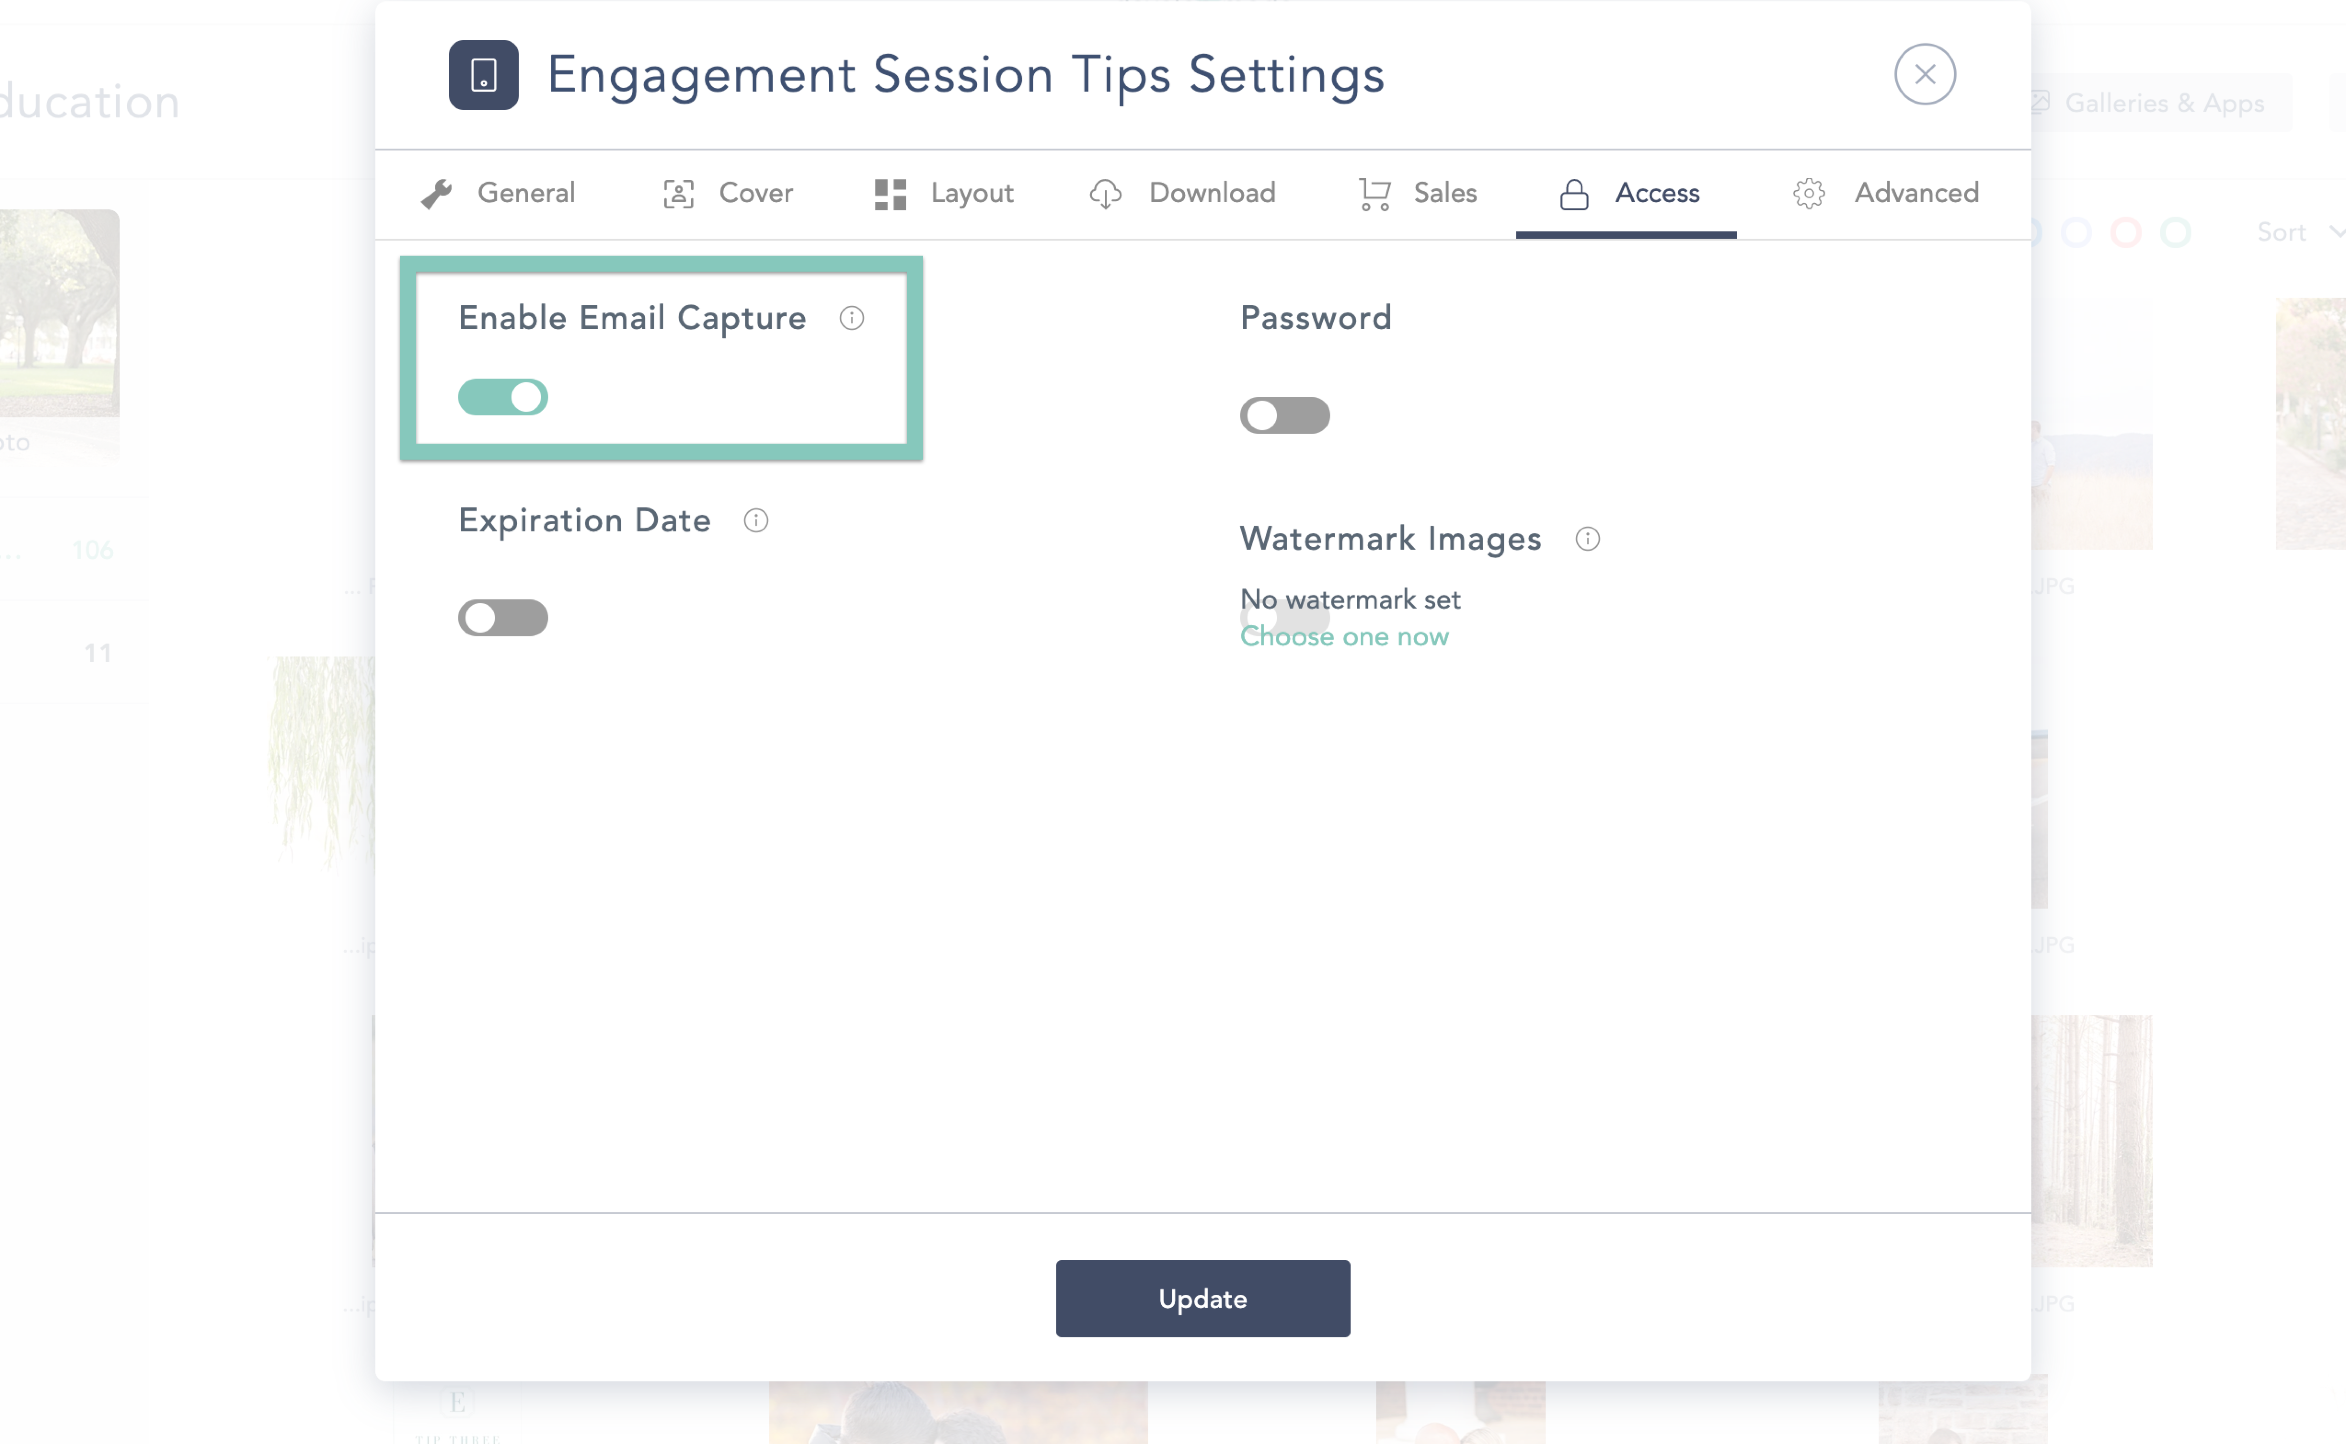
Step: 4: Grow your email list
CloudSpot photo galleries and Mobile Apps have the ability to capture emails for you when a client enters to view their photos (GENIUS right?!). So, when a new couple downloads your Mobile App, they will be automatically added to your email list. This is a great way to provide even more value to potential clients and increase your bookings! So don’t forget to enable Email Capture on your app.
Step 5: SHARE IT!
It may give you butterflies to share something this big with the world, but that just means you are elevating your brand and business!! Here are some fantastic suggestions for sharing your brand new Mobile App:
1. Write a blog post about your new app,
2. Include it on your other blog posts,
3. Add it as a free resource on your website,
4. Share on social media,
5. Add it to your Pinterest boards,
6. Share with past clients (everyone loves being featured!),
7. Share with your fellow creatives, and...
8. Share in the CloudSpot Facebook group so I can see your creation!
Bonus Tips:
1. Have a few follow up emails ready to go so you can continue to provide valuable resources for your new email list. This can be the easiest way to increase your bookings even during a busy season!
2. Create a fun intro video to explain the app and “meet” the couples downloading your app. This is an easy way to make it personal and unique while utilizing this extra feature in CloudSpot galleries!
CloudSpot makes it so easy to create, customize, and share this engagement session app with existing and brand new couples. There is so much you can do with CloudSpot besides displaying final galleries, the ideas are endless! I am so excited to see what you create!
Get started with CloudSpot for free by clicking on this link.

.png)


%20(1).avif)


