
.png)


.jpg)


.webp)
.webp)
.webp)
.webp)
.webp)


.webp)


s a wedding photographer, I strive to create a product for my clients that evokes memory and emotion. While still images can bring couples back to the emotions they felt during their session or on a wedding day, I was looking for a way to truly make those moments come alive!
The idea of adding videography to my list of tasks for a session or wedding seemed daunting. Adding multiple images of the same moment to a gallery seemed repetitive. The solution I found? GIFs! Creating a GIF became an easy way to show snippets of motion in my galleries, without changing much about how I was shooting. By simply capturing a few burst sequences during a session, I am able to quickly and easily make small stop motion GIFs that round out my galleries and complete the love story I’m trying to tell!
Adding GIFs to Your Client Gallery
Creating a unique client gallery experience with GIFs is easy! CloudSpot has GIF integration, meaning my GIFs are seamlessly delivered in a client’s gallery, the same as any other image. You can upload your GIF as an image within a gallery or set a GIF as the main cover image of a gallery, meaning the client is greeted with an impressive, moving image before reliving the memories of their day. I’ve found plenty of motion during a wedding day that I’ve turned into GIFs: toasting glasses, a first kiss, a slow dance, or even guests jumping to music!
How to Make a GIF file in Adobe Photoshop!
Step 1: Edit and sync settings to all photos in Lightroom before assembling your .GIF
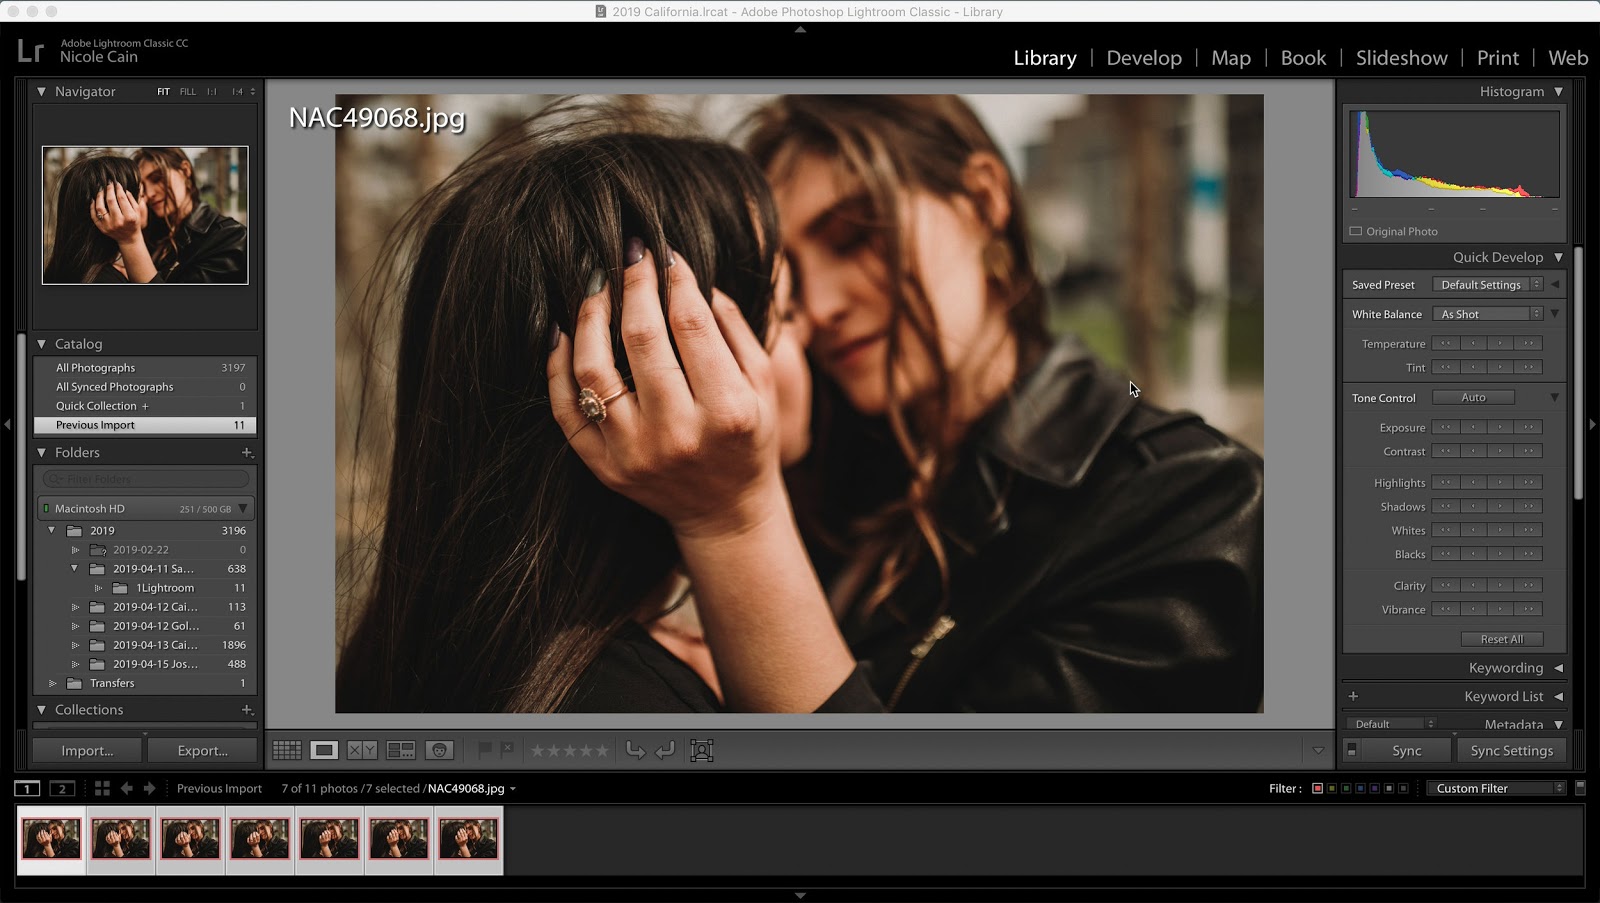
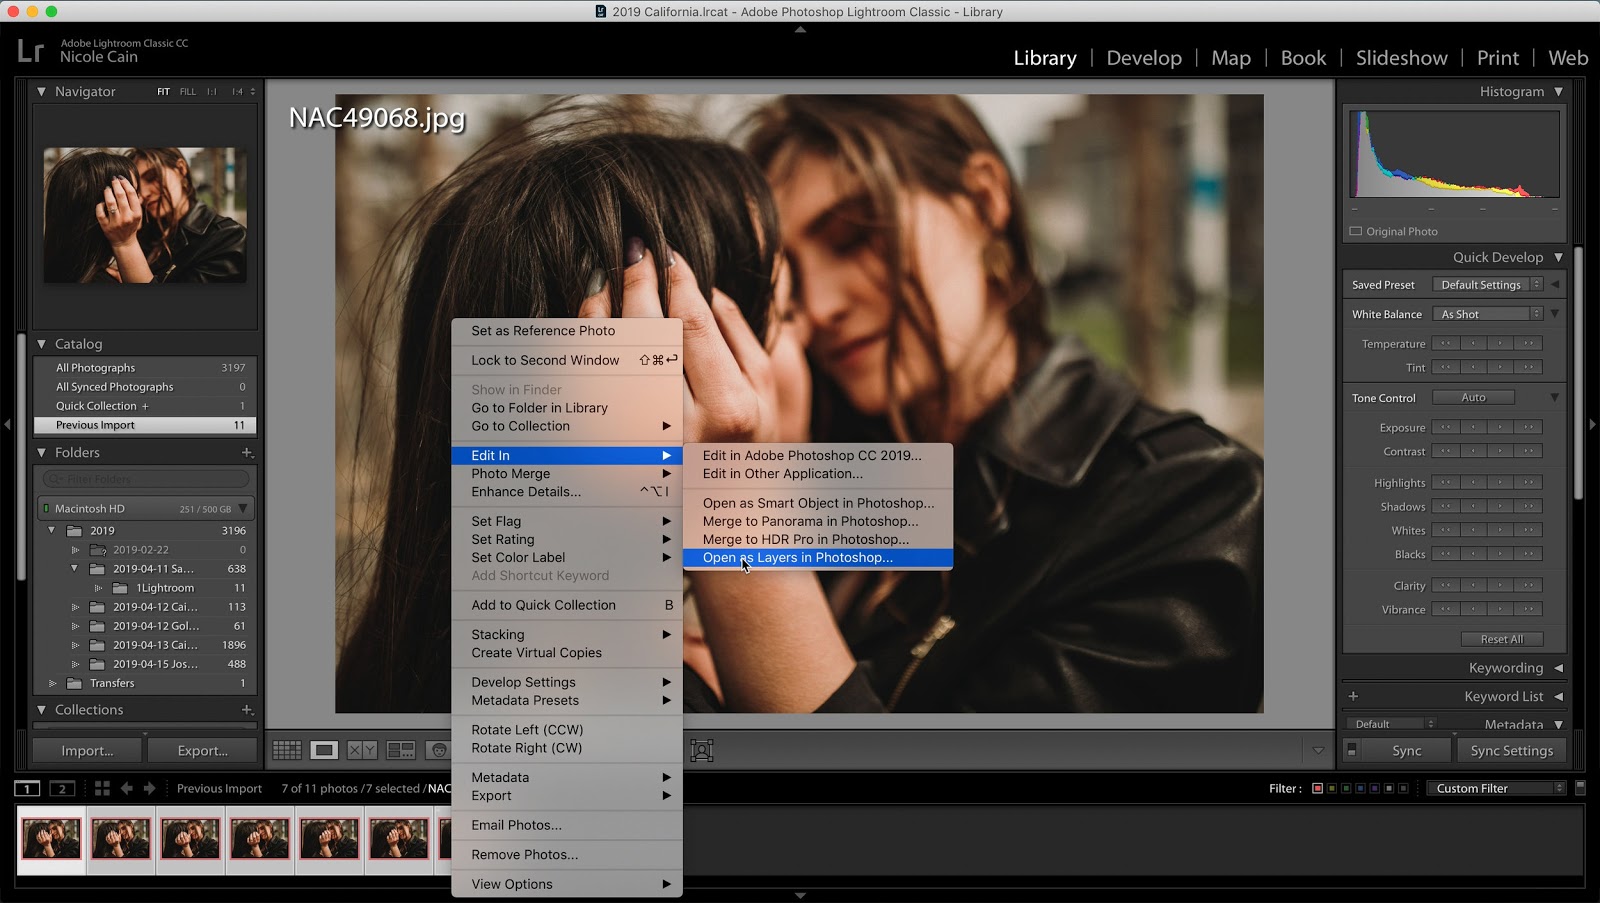
Step 2: Select All Images, then select Edit In / Open as Layers in Photoshop
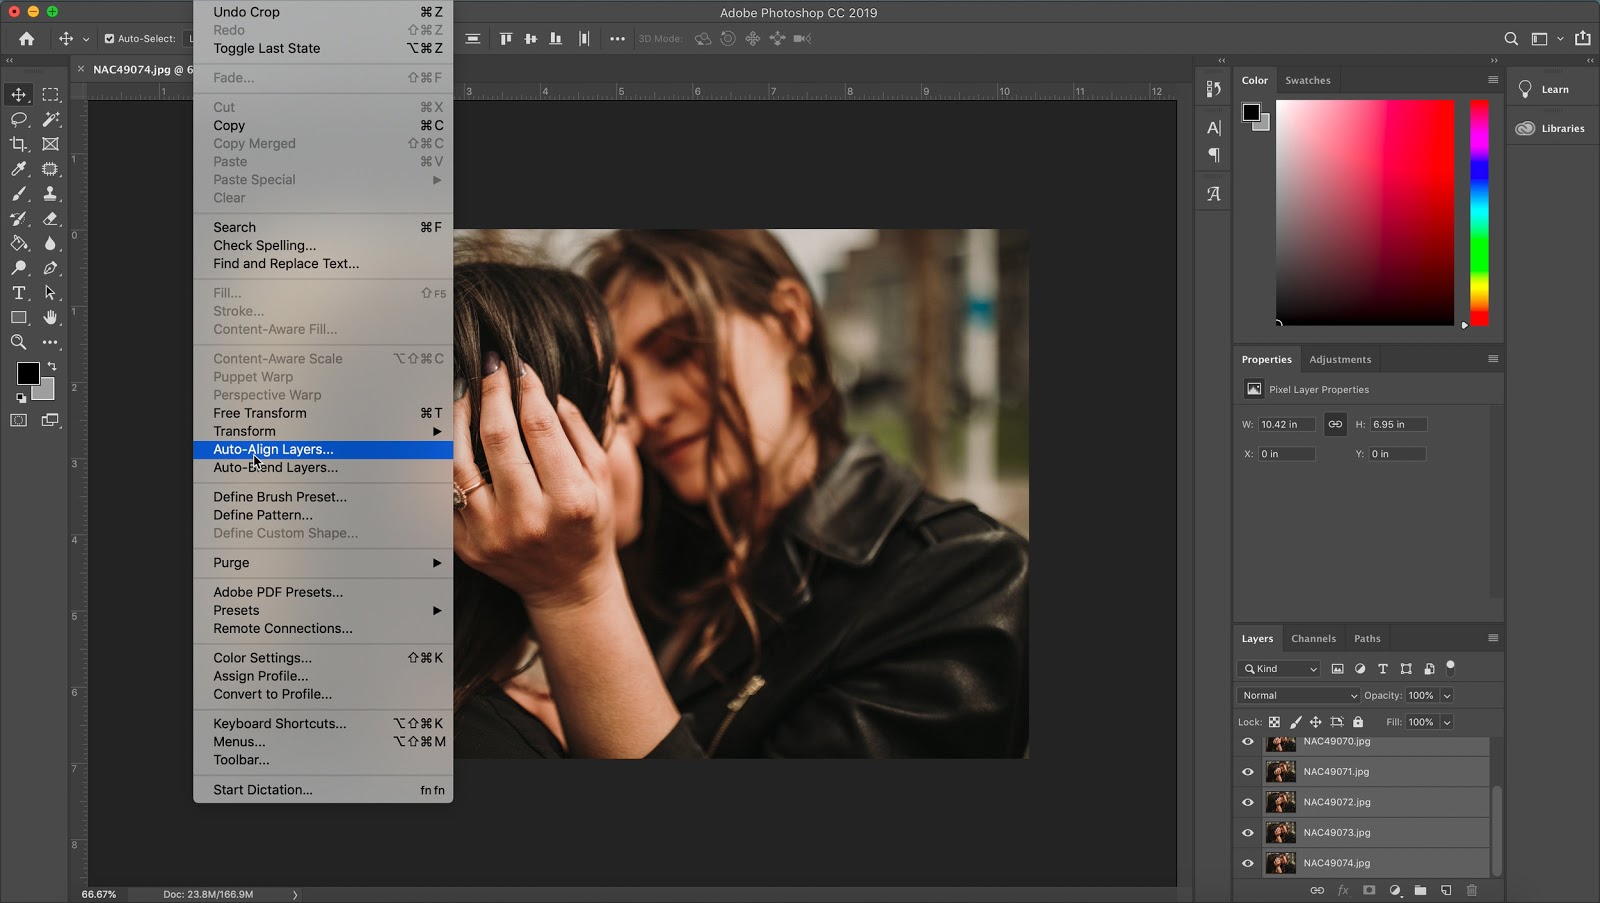
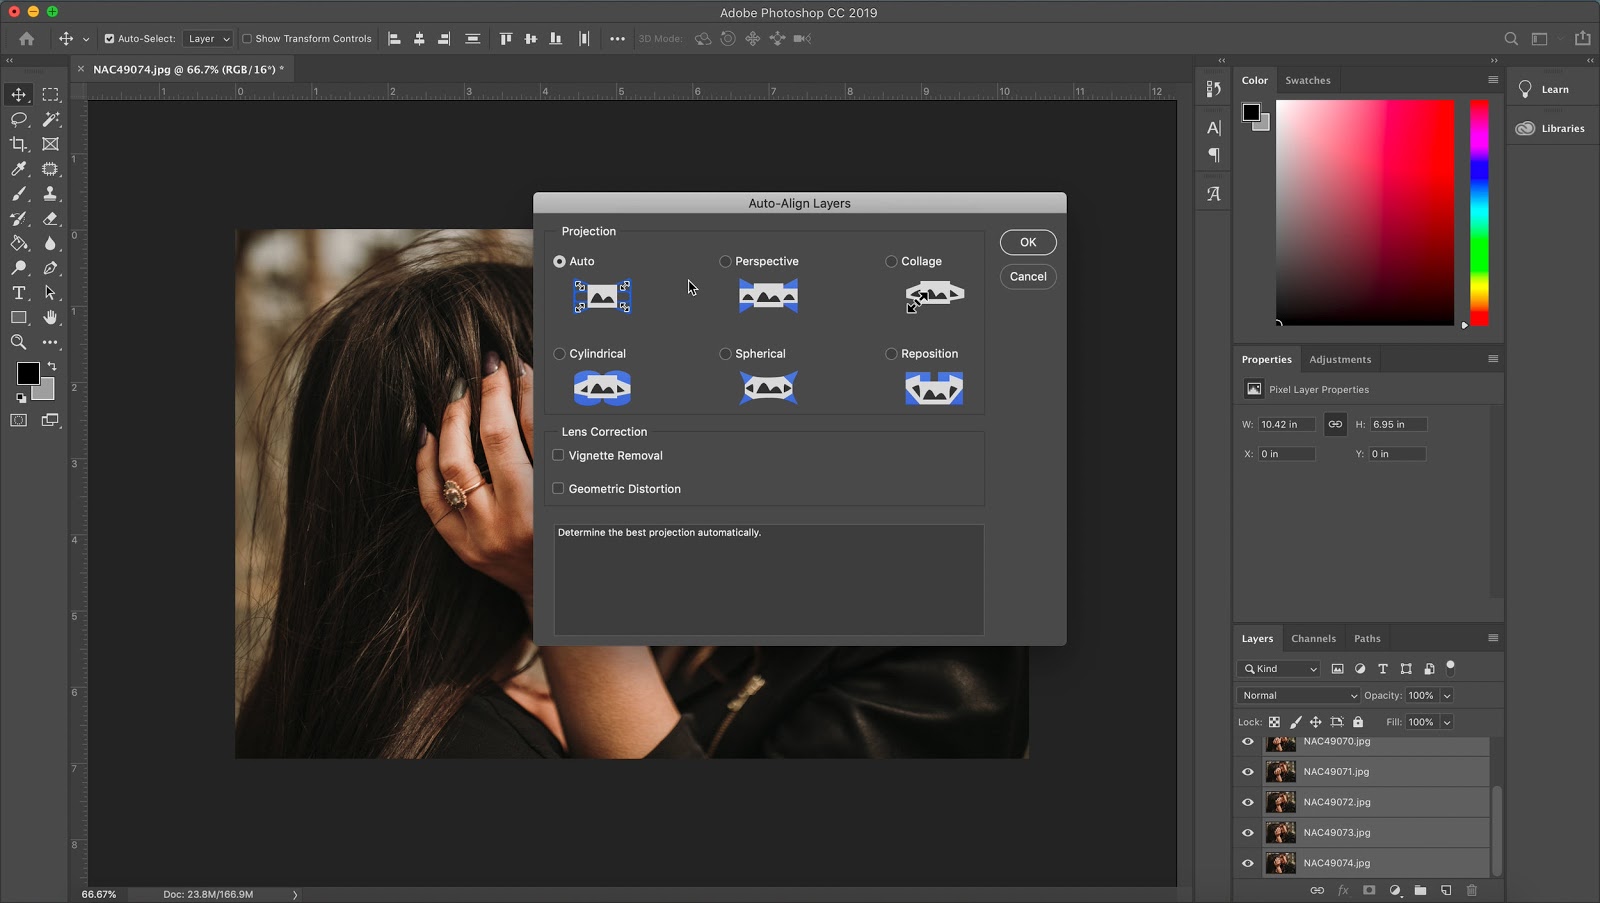
Step 3: In Photoshop, select all layers, then under Edit menu, select Auto Align Layers / Auto Projection
This will ensure smoother playback once your frames are playing one after another, and isolate your background.
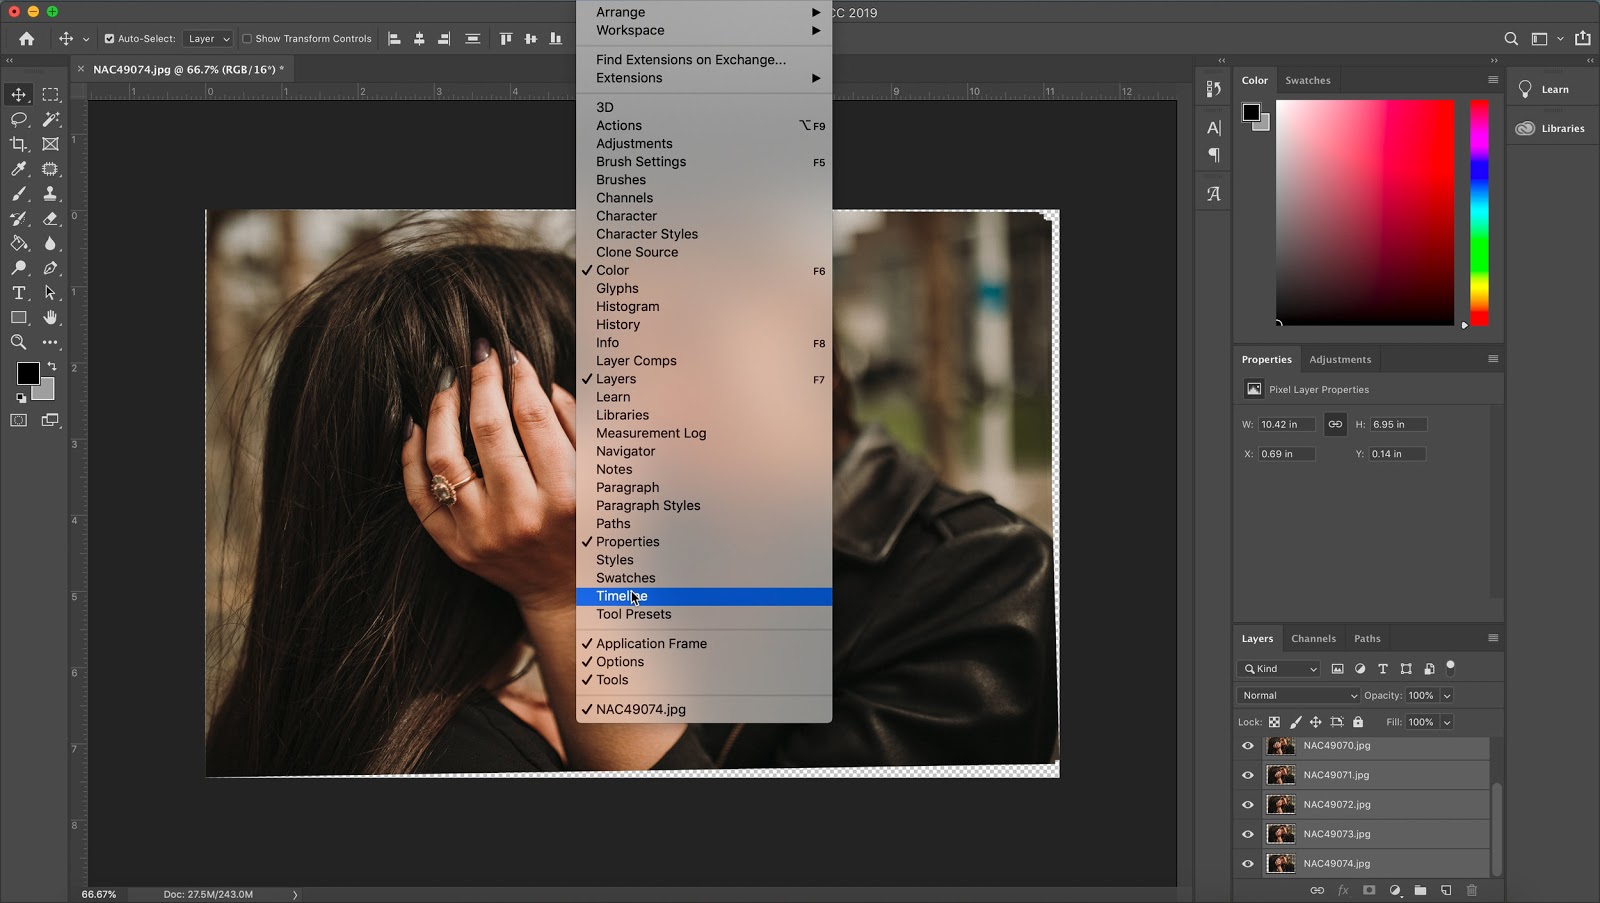
Step 4: Under the Window menu, select Timeline to open the timeline tools on the bottom of your screen
It’s time to start animating our .GIF!
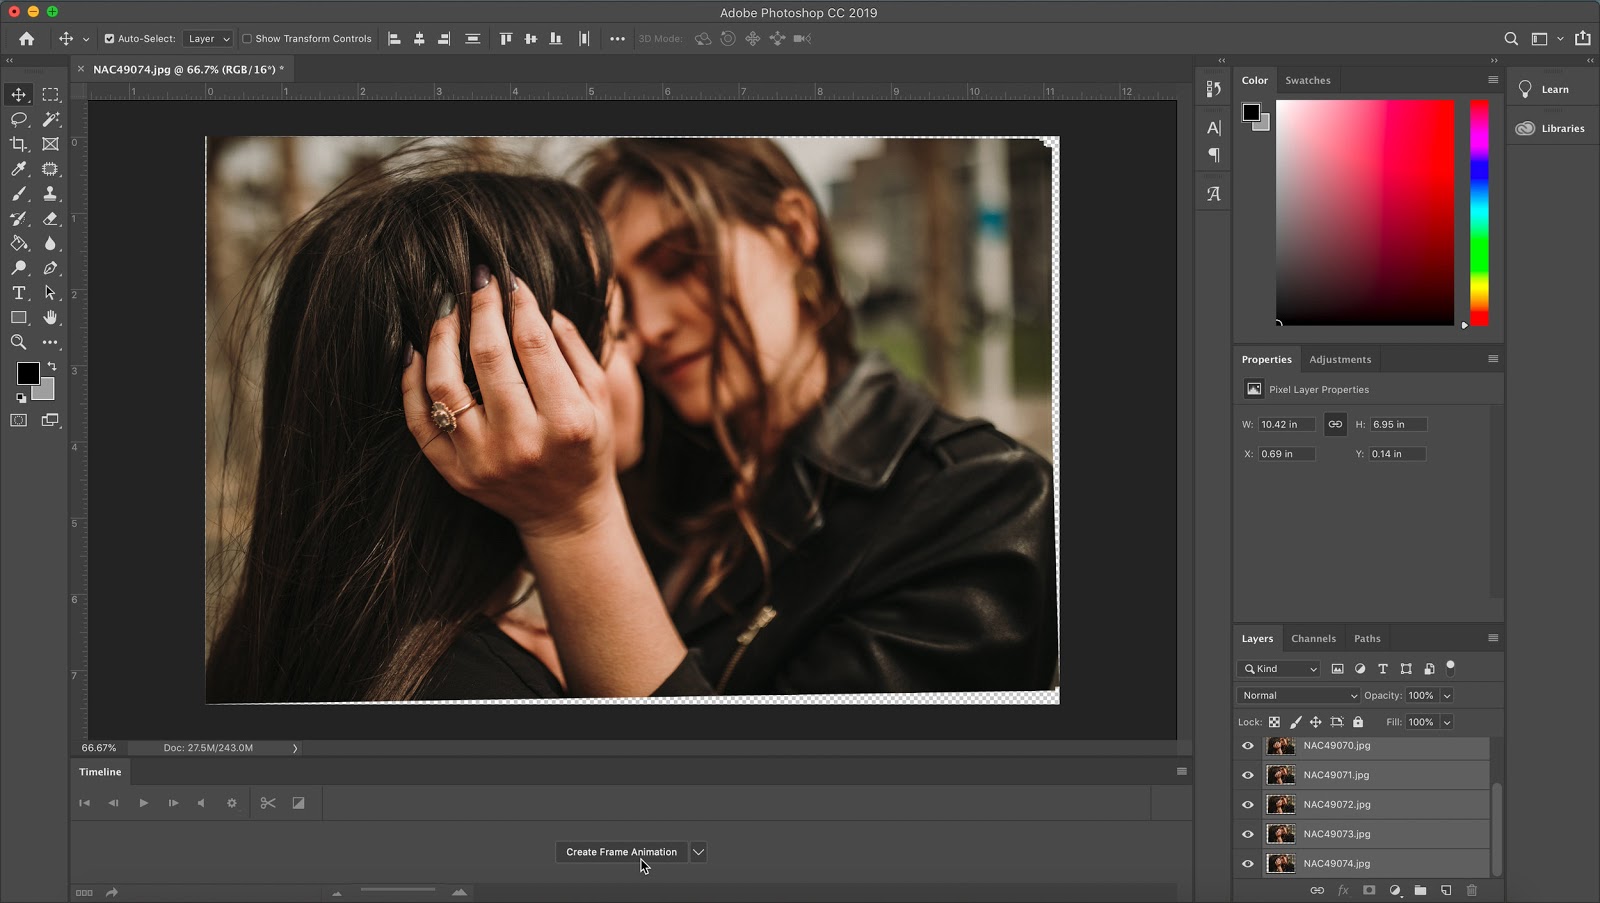
Step 5: In the Timeline window, select the button, Create Frame Animation
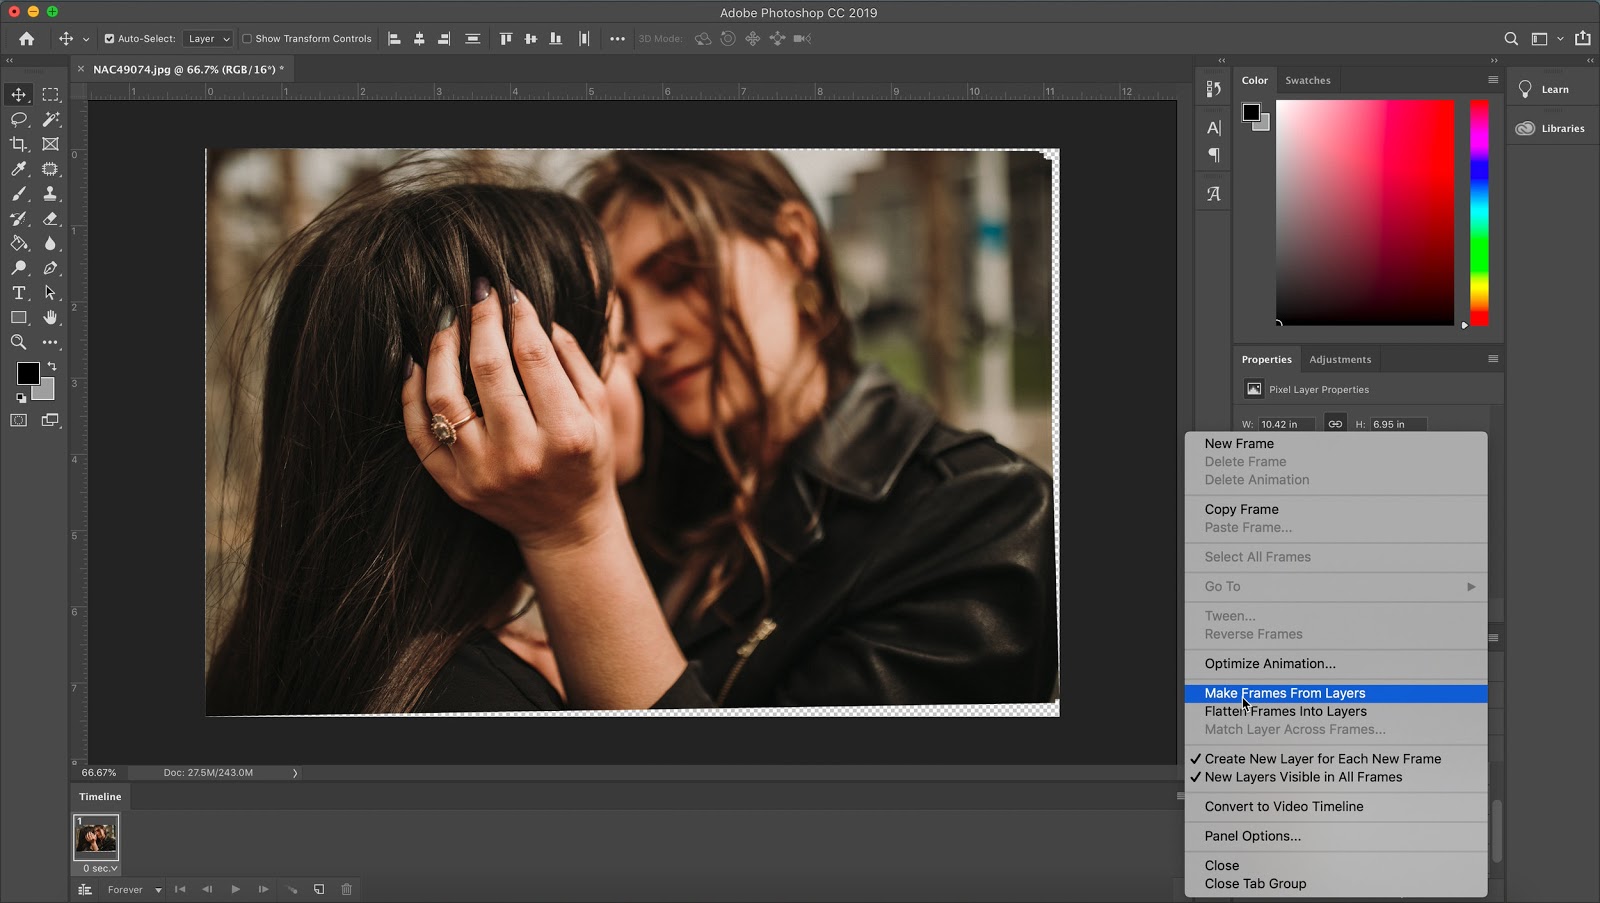
Step 6: Select the top right button in the Timeline window (lines), and click Make Frames From Layers
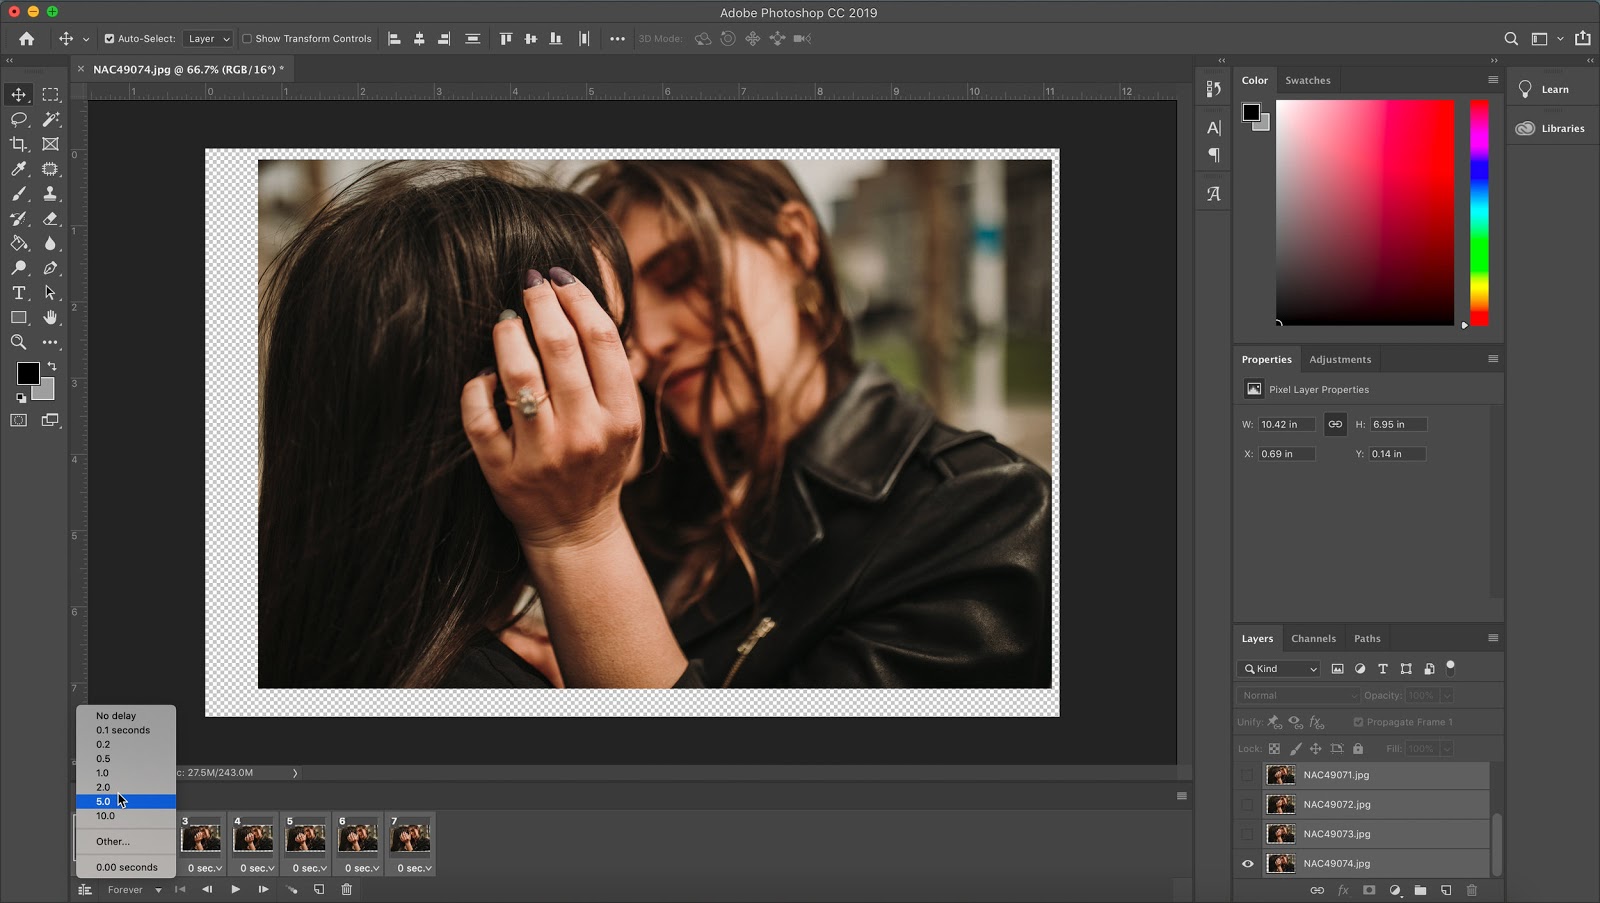
Step 7: Select all of your frames, click the time option at the bottom of a single frame, and choose your desired time interval
This will determine the overall playback speed.
Step 8: Crop in to remove negative space

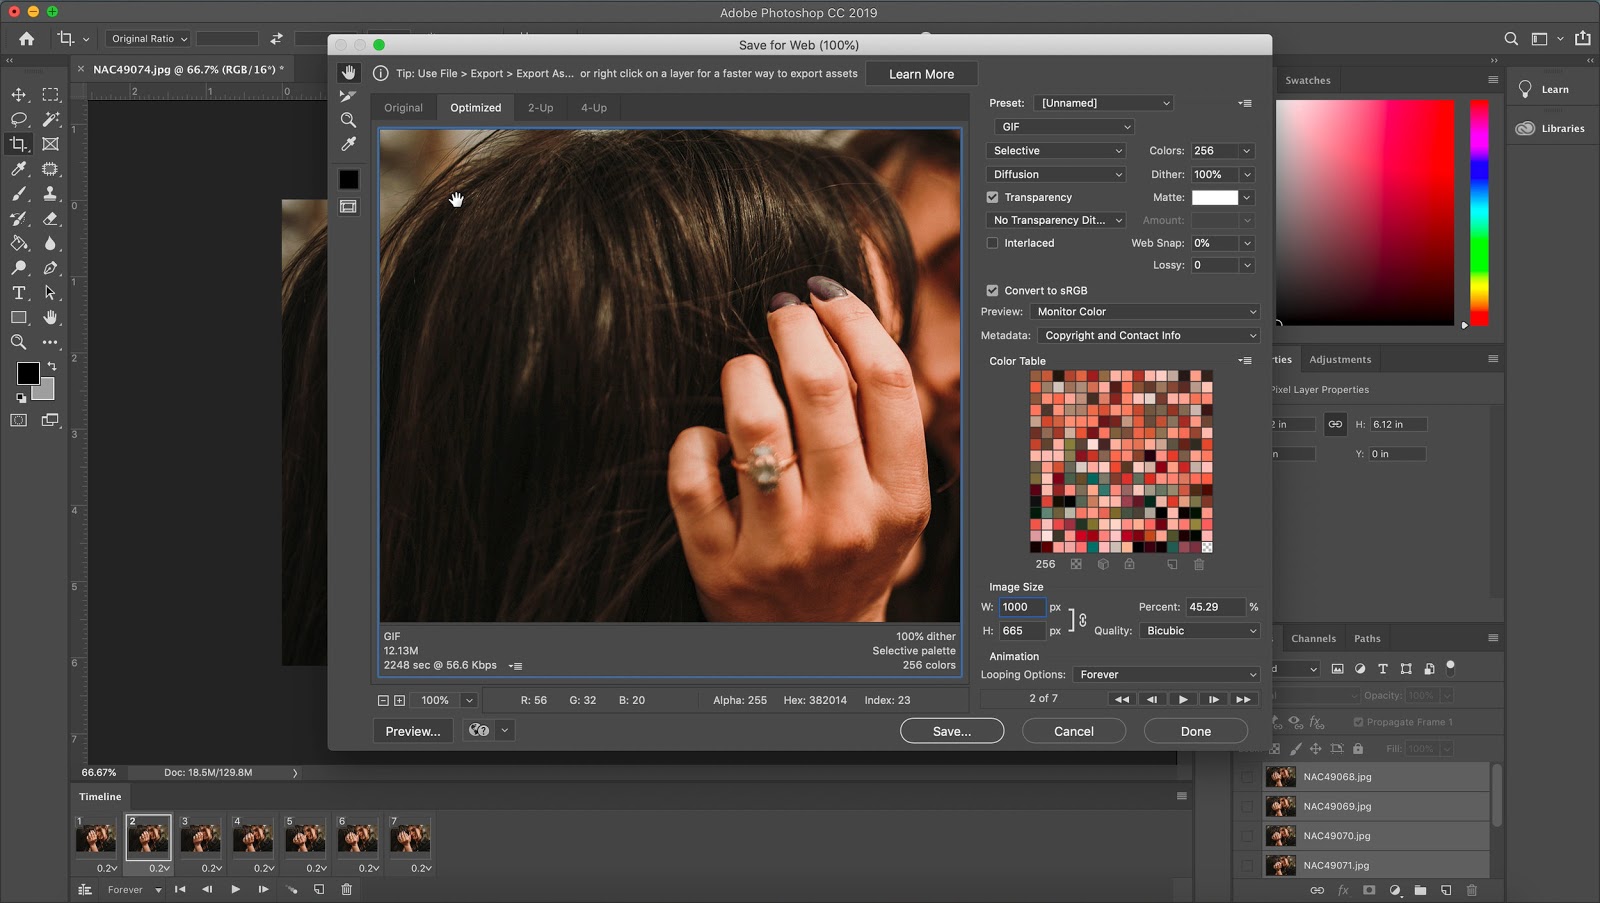
Step 9: Under the File menu, Select Export, then Save for Web
Make sure to choose your desired dimensions for posting. Menu pictured below:
That’s it! Not too bad, right? Make sure to think about moments that would make great GIFs at your next session and really impress your clients!
Want to add your GIF to a CloudSpot gallery for yourself? Start for free today.

.png)


%20(1).avif)


