
.png)


.webp)


.webp)
.webp)
.webp)
.webp)
.webp)


.webp)


is the season to start planning for fall and holiday mini sessions! We know you are busy planning to have countless families in front of your camera— with all of the coordination, photography, and editing that will be on your plate, we wanted to share a quick tip to make your mini sessions workflow that much easier!
Learn the easiest way to set up your CloudSpot Galleries to maximize your mini session profit while saving you hours of time!
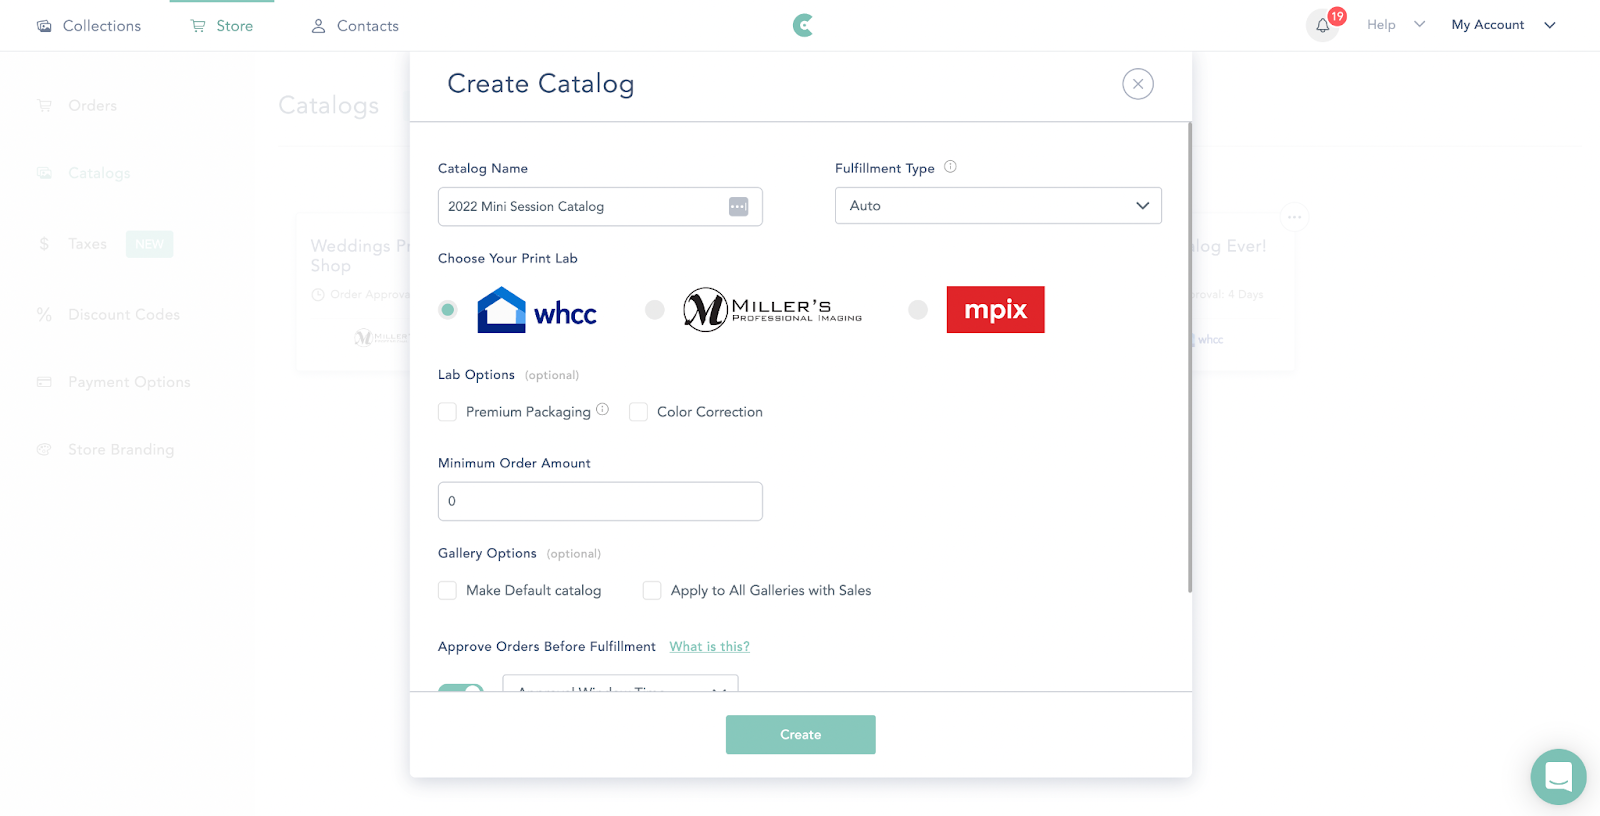
Create Print Catalogs including Print and Digital Packages
We recommend that you start the process of creating your CloudSpot mini session workflow by creating the Print Catalog that will be applied to each gallery you deliver. This ensures that you will have the proper print catalog to add to your gallery presets. Don’t forget to set your print markup and to create Print and Digital Packages to maximize your profitability.
Create a Gallery Preset
Consistency is key when it comes to client experience. By creating a gallery preset, you’ll ensure that the settings on the galleries you send to clients are identical… saving time in the process! Customize your download settings, access permissions, custom Print Catalog, and more! Once the settings are tailored to your liking, simply save as a Gallery Preset for use on all of your mini session galleries.

Save Your Gallery Delivery Email Template
Once you have created your Gallery Preset, navigate to your Gallery Settings and draft the image delivery email that you plan to send to clients! Pick your email design, add text to help clients access their images, give it an intentional name, and press save. This will create a Gallery Delivery Email Template within CloudSpot to utilize when it is time to deliver your mini sessions!
Edit and Export Images into Folders
As you edit your mini session galleries, keep things organized! We recommend editing and exporting images into individual folders reflective of the final client galleries that will be delivered. You’ll use these in the upload process next.
Upload Folders to One Collection
Once your images have been exported, upload all of the folders to one Collection. Remember those individual folders you just made? You’ll keep all of your mini session images organized in one easy-to-find hub. To upload multiple folders at once, tap + New Collection on the main CloudSpot Dashboard. Click + Add Folder in the bottom left hand corner and select Upload Folders. Drag and drop the folders you would like to upload into the box in the center of the screen, and we’ll take care of the rest!
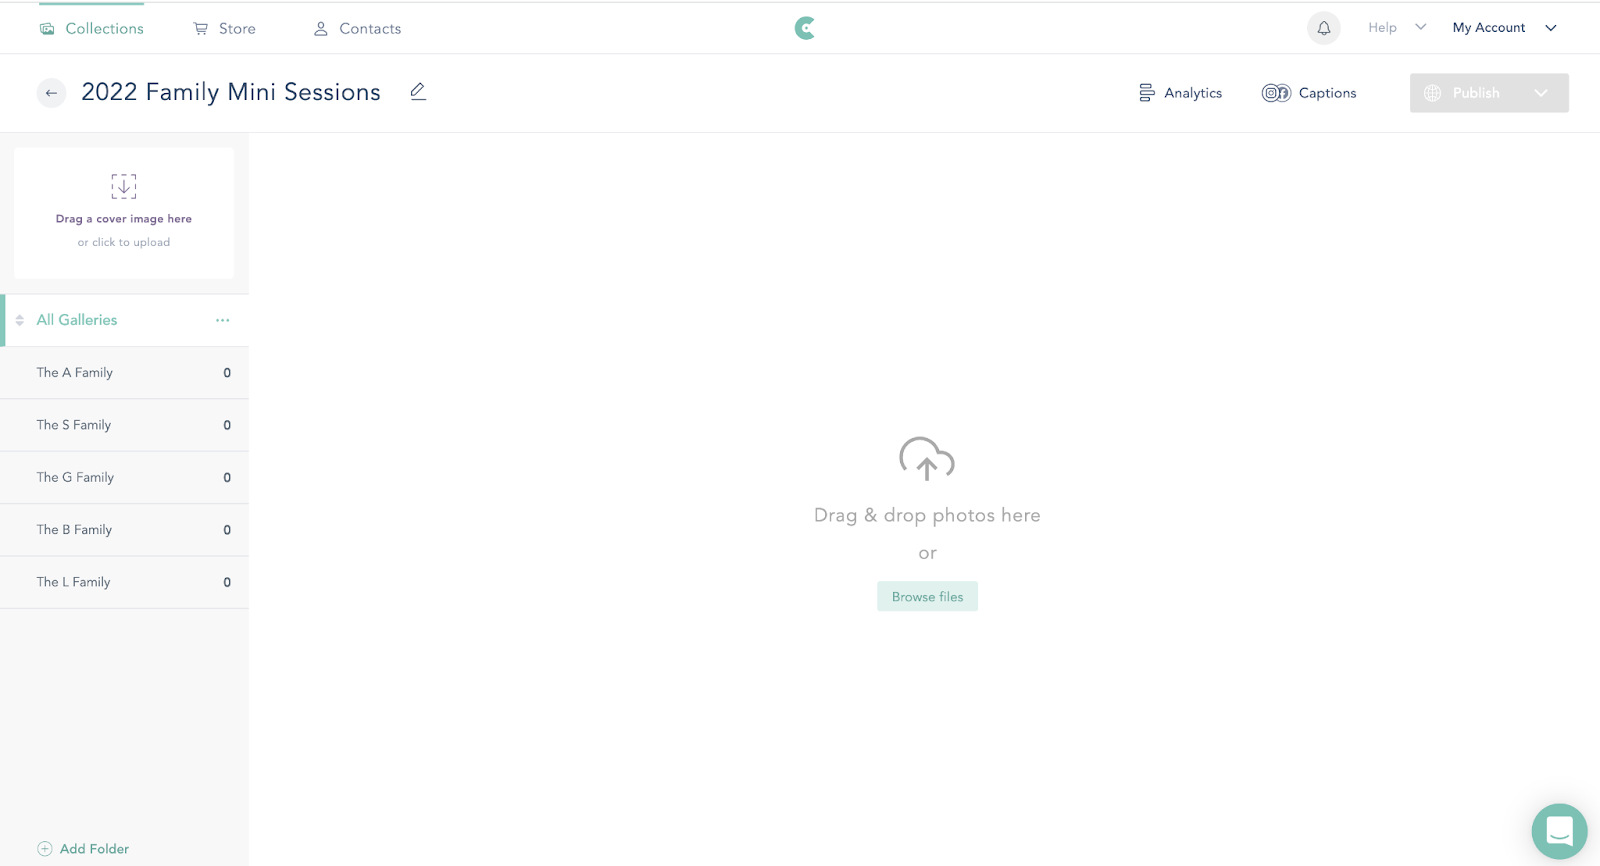
Create Gallery for Each Session
Once your folders are created, you’ll want to create individual galleries for each session you are to deliver. You’ve already done the hard work to prep presets and product catalogs, so this should just take a few clicks! Create a gallery containing one mini session folder, apply your preset, and set your cover photo. Rinse and repeat until you have created galleries for all of your clients. Keep in mind that each gallery created can Hide or Show folders as needed.
Email to Your Clients
You know your workflow best! You can either email your clients as you prep their galleries and check this step off as you go, or you can send galleries once they have all been created. You’ve already drafted your gallery delivery email, so sending your galleries off should just take a few clicks! After tapping on the email button next to the gallery you are hoping to deliver, enter your client’s information, update the email settings to reflect your needs, select the template, and press send… it’s that easy! 🙌
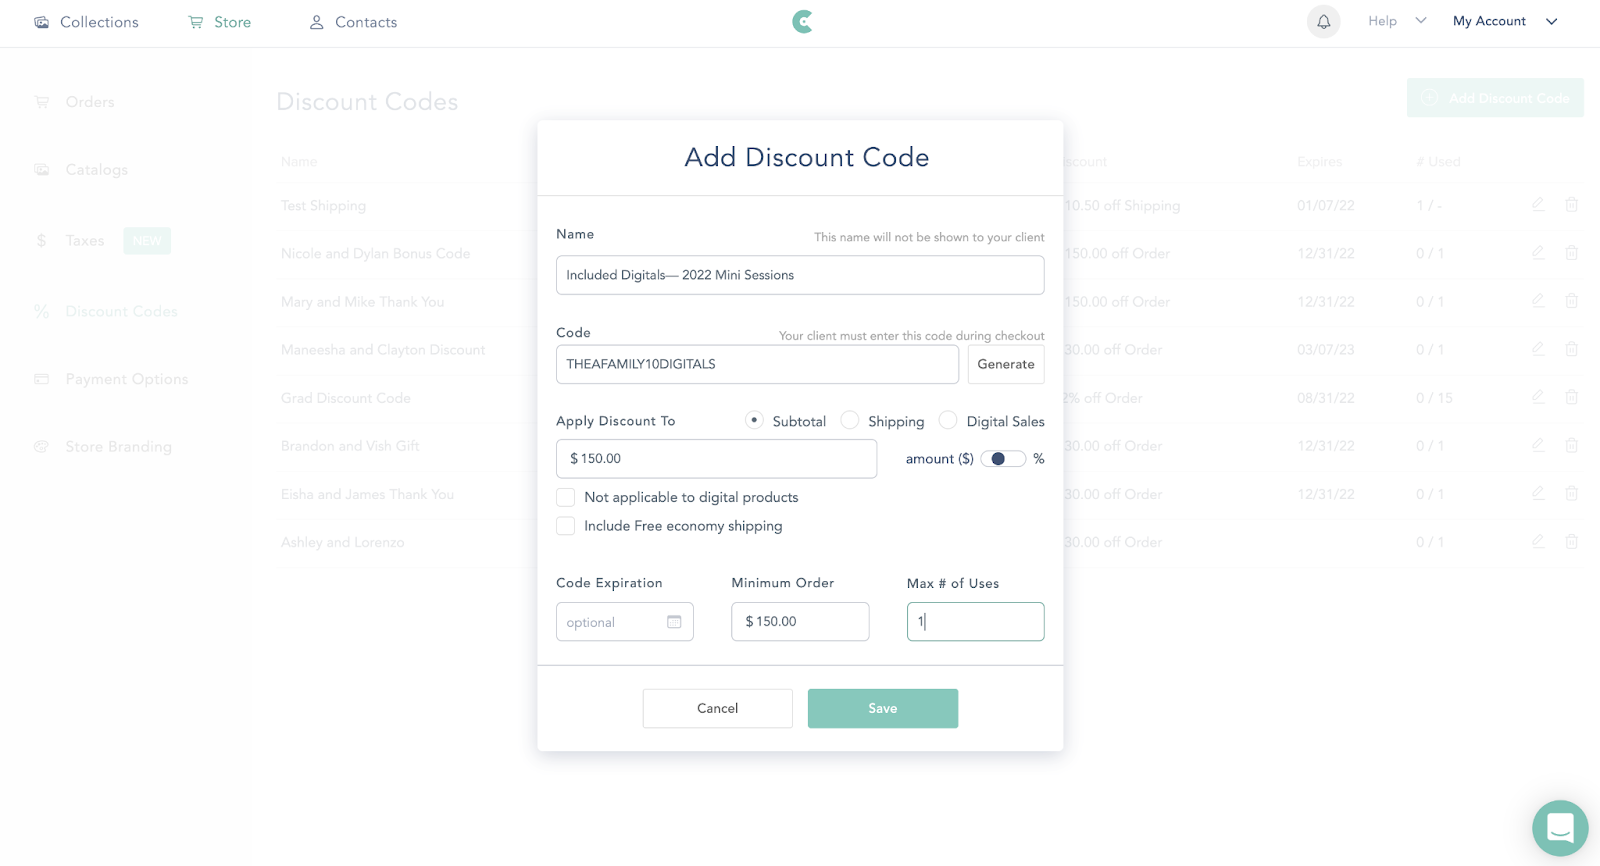
Tips for Digital Downloads
One final note… if you are hoping to deliver a set number of digital images to your clients, we recommend doing so through a coupon code. Ensure that digital downloads are enabled in your store’s catalog. From there, create a discount code to cover the cost of the images that are included with your mini session packages. For example, mini sessions include 5 digital downloads. You can set the cost for each download to be $30 and then create a discount code for $150 off a digital purchase of $150 or more. Clients will receive store credit for the images they purchased from their session and they can also purchase more if they choose. Discount codes often motivate your client to purchase more, which is a win-win for both of you.
Next, you can learn how to upsell digital files for your mini sessions. Good luck, friend! We know you are going to rock your mini sessions!
Not a CloudSpot user and wanting to test it out? Get started today for free.

.png)


%20(1).avif)


