
.png)


.jpg)


.webp)
.webp)
.webp)
.webp)
.webp)


.webp)


ou have a school photoshoot and have a few questions on how to set up your CloudSpot account for school photo success. Setting up your gallery for school photos can be similar to setting up galleries for family mini sessions. In this blog, we will talk about three ways to set up your Galleries for your client, how to offer digital and print sales through CloudSpot, and how to offer print sales offline.
First, let's start with the basics. What is the difference between a Collection, Folder, Gallery, and Portfolio?
Collection, Folder, Gallery, and Portfolio - Oh my!
Don't worry, it sounds like a lot, but the definitions are easy!
- Collection - Think of a CloudSpot Collection as a collection of images. This could be a collection of the whole school photoshoot, a collection of class images, or a specific student. All photos can be uploaded here and then organized into Folders.
- Folder - A CloudSpot Folder is a way to organize Collections into phases of the photoshoot. For school photos, you could set each Folder up for each student's images.
- Gallery - Once your images are uploaded to a Collection and the Gallery is published, your CloudSpot Gallery is a link that can show one or more Folders of images to your client.
- Portfolio - A CloudSpot Portfolio is a public or private way of sharing multiple Galleries within one link.
Now, let's talk about the most common ways to set up your Collections, Folders, Galleries, and Portfolios to set you up for school photo success!
One Collection Per Class and One Folder Per Student
If the school wants all photos of all students available in one gallery link, you can make 1 Collection for all school photos with a different Folder per child.
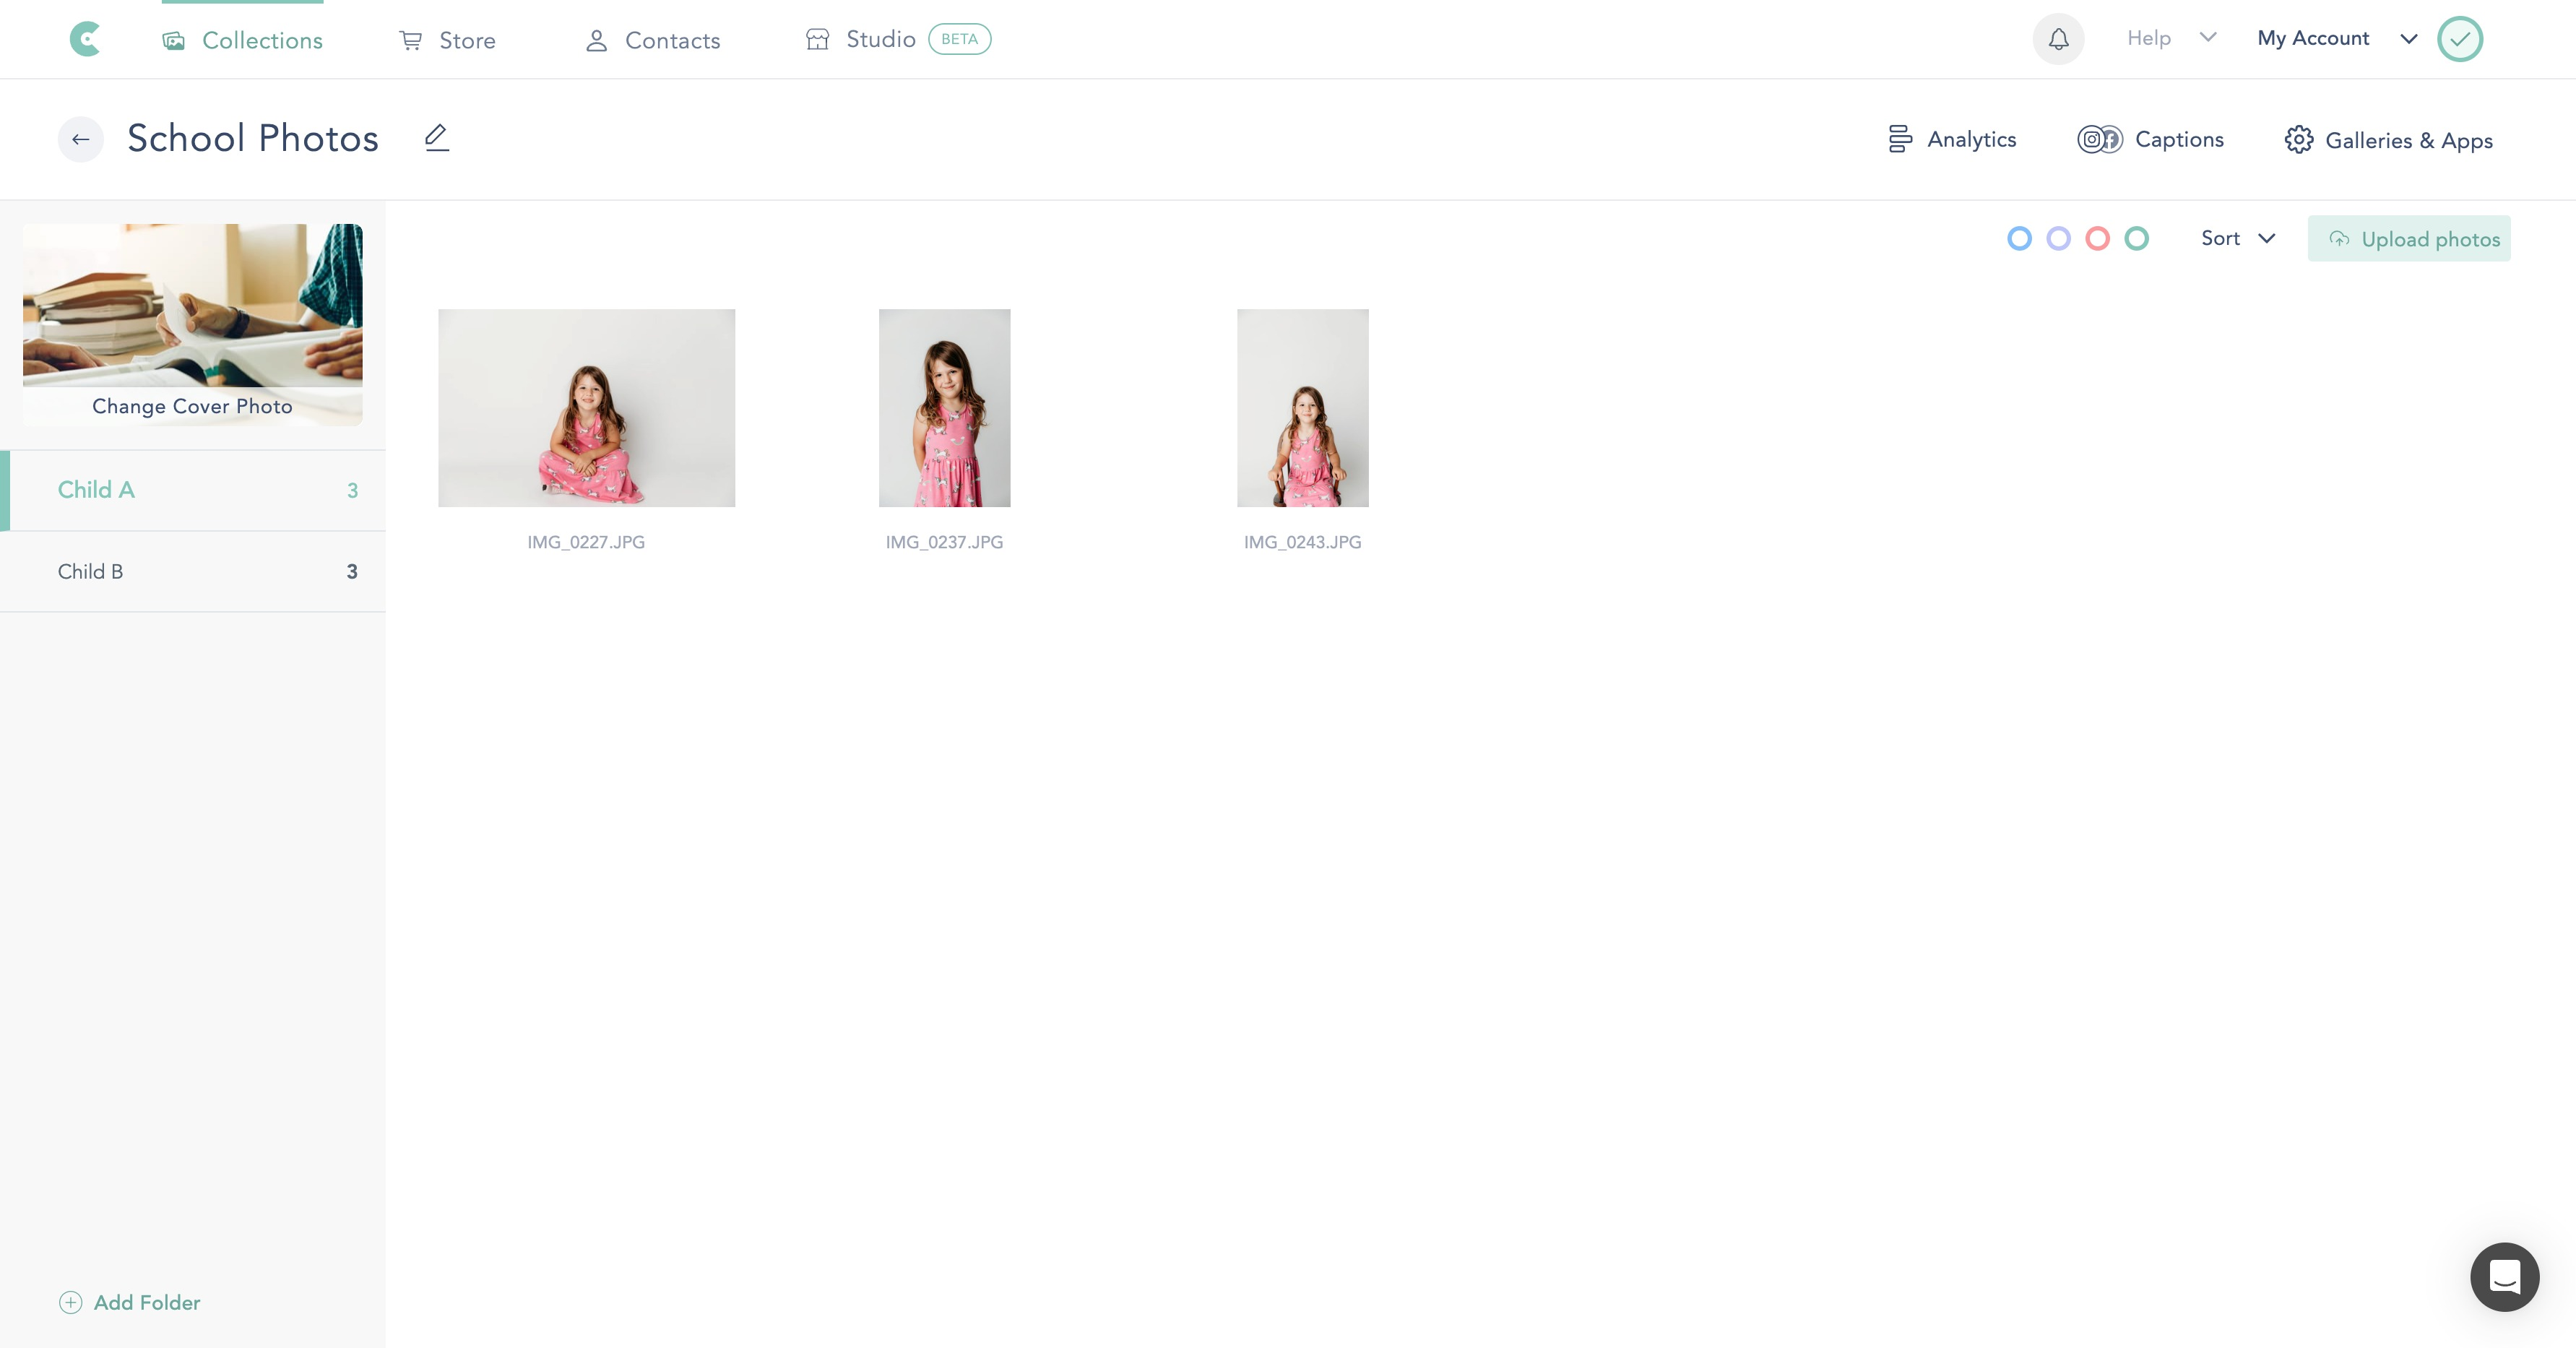
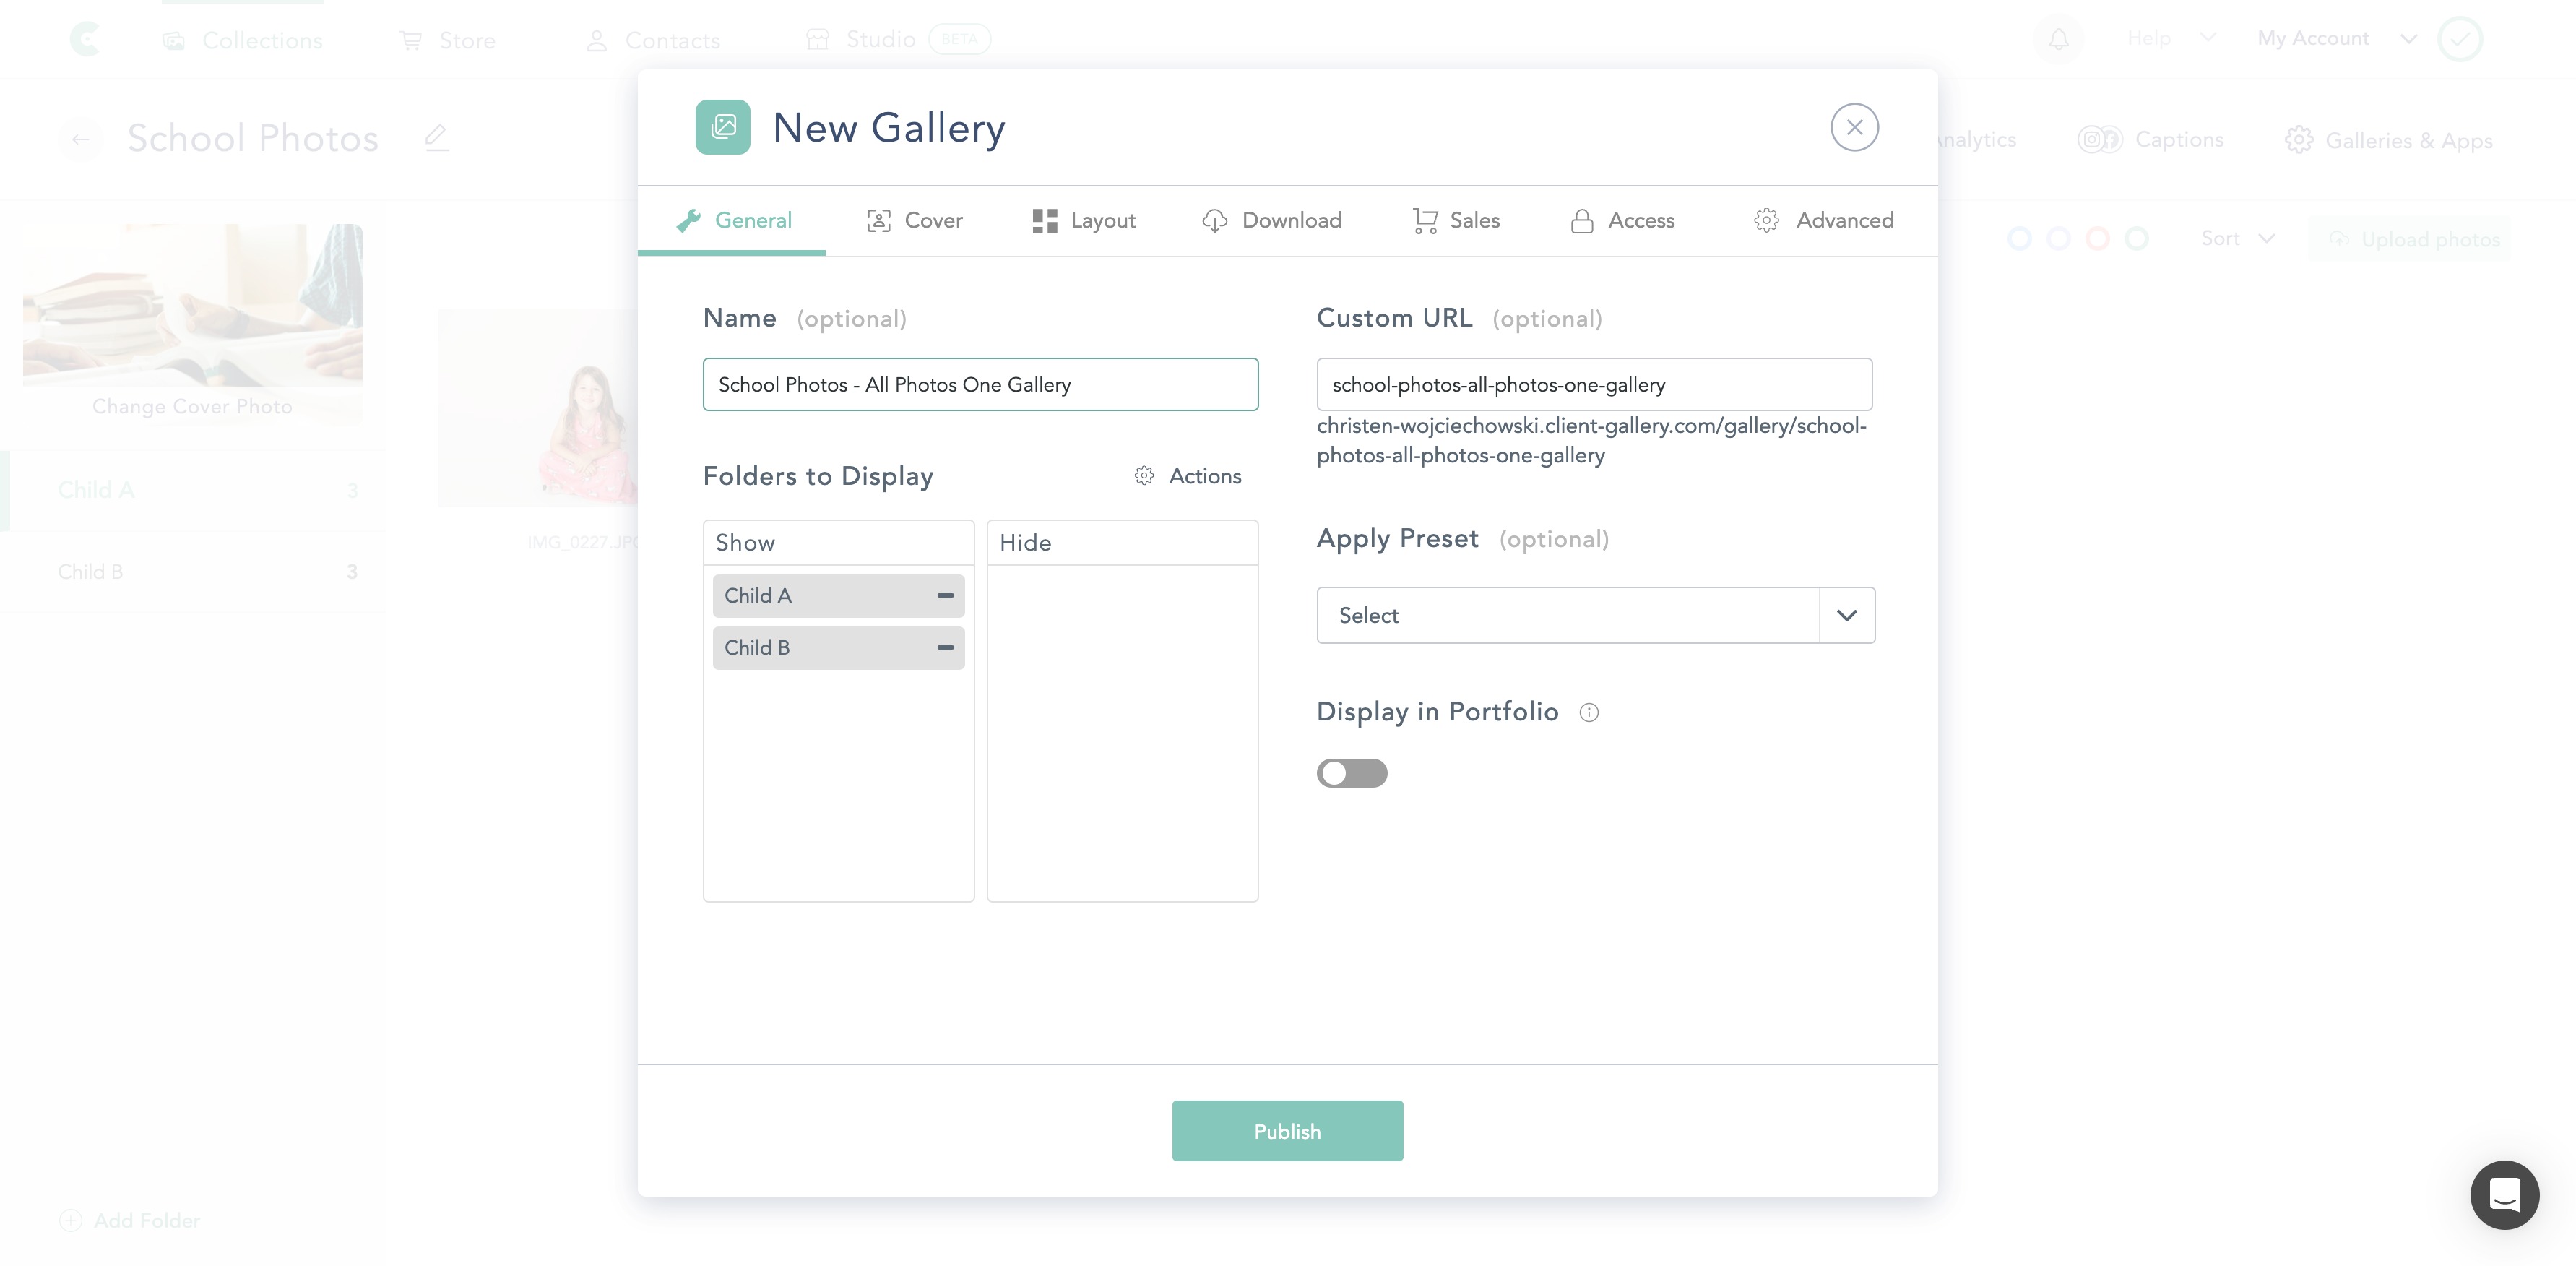
When publishing the Gallery, include all Folders in 1 Gallery. To do this, go to your Gallery Settings and make sure all Folders are under the "Show" column vs the "Hide" column. This option would be best if you are sending all photos of all children to the school or are ok if people with that gallery link can see other children's photos.
Note: If you add a Folder to your Collection after the Gallery is published, go back into your Gallery settings and make sure the Folders you want are under Show and Hide column.
One Collection Per Class and One Gallery Per Student
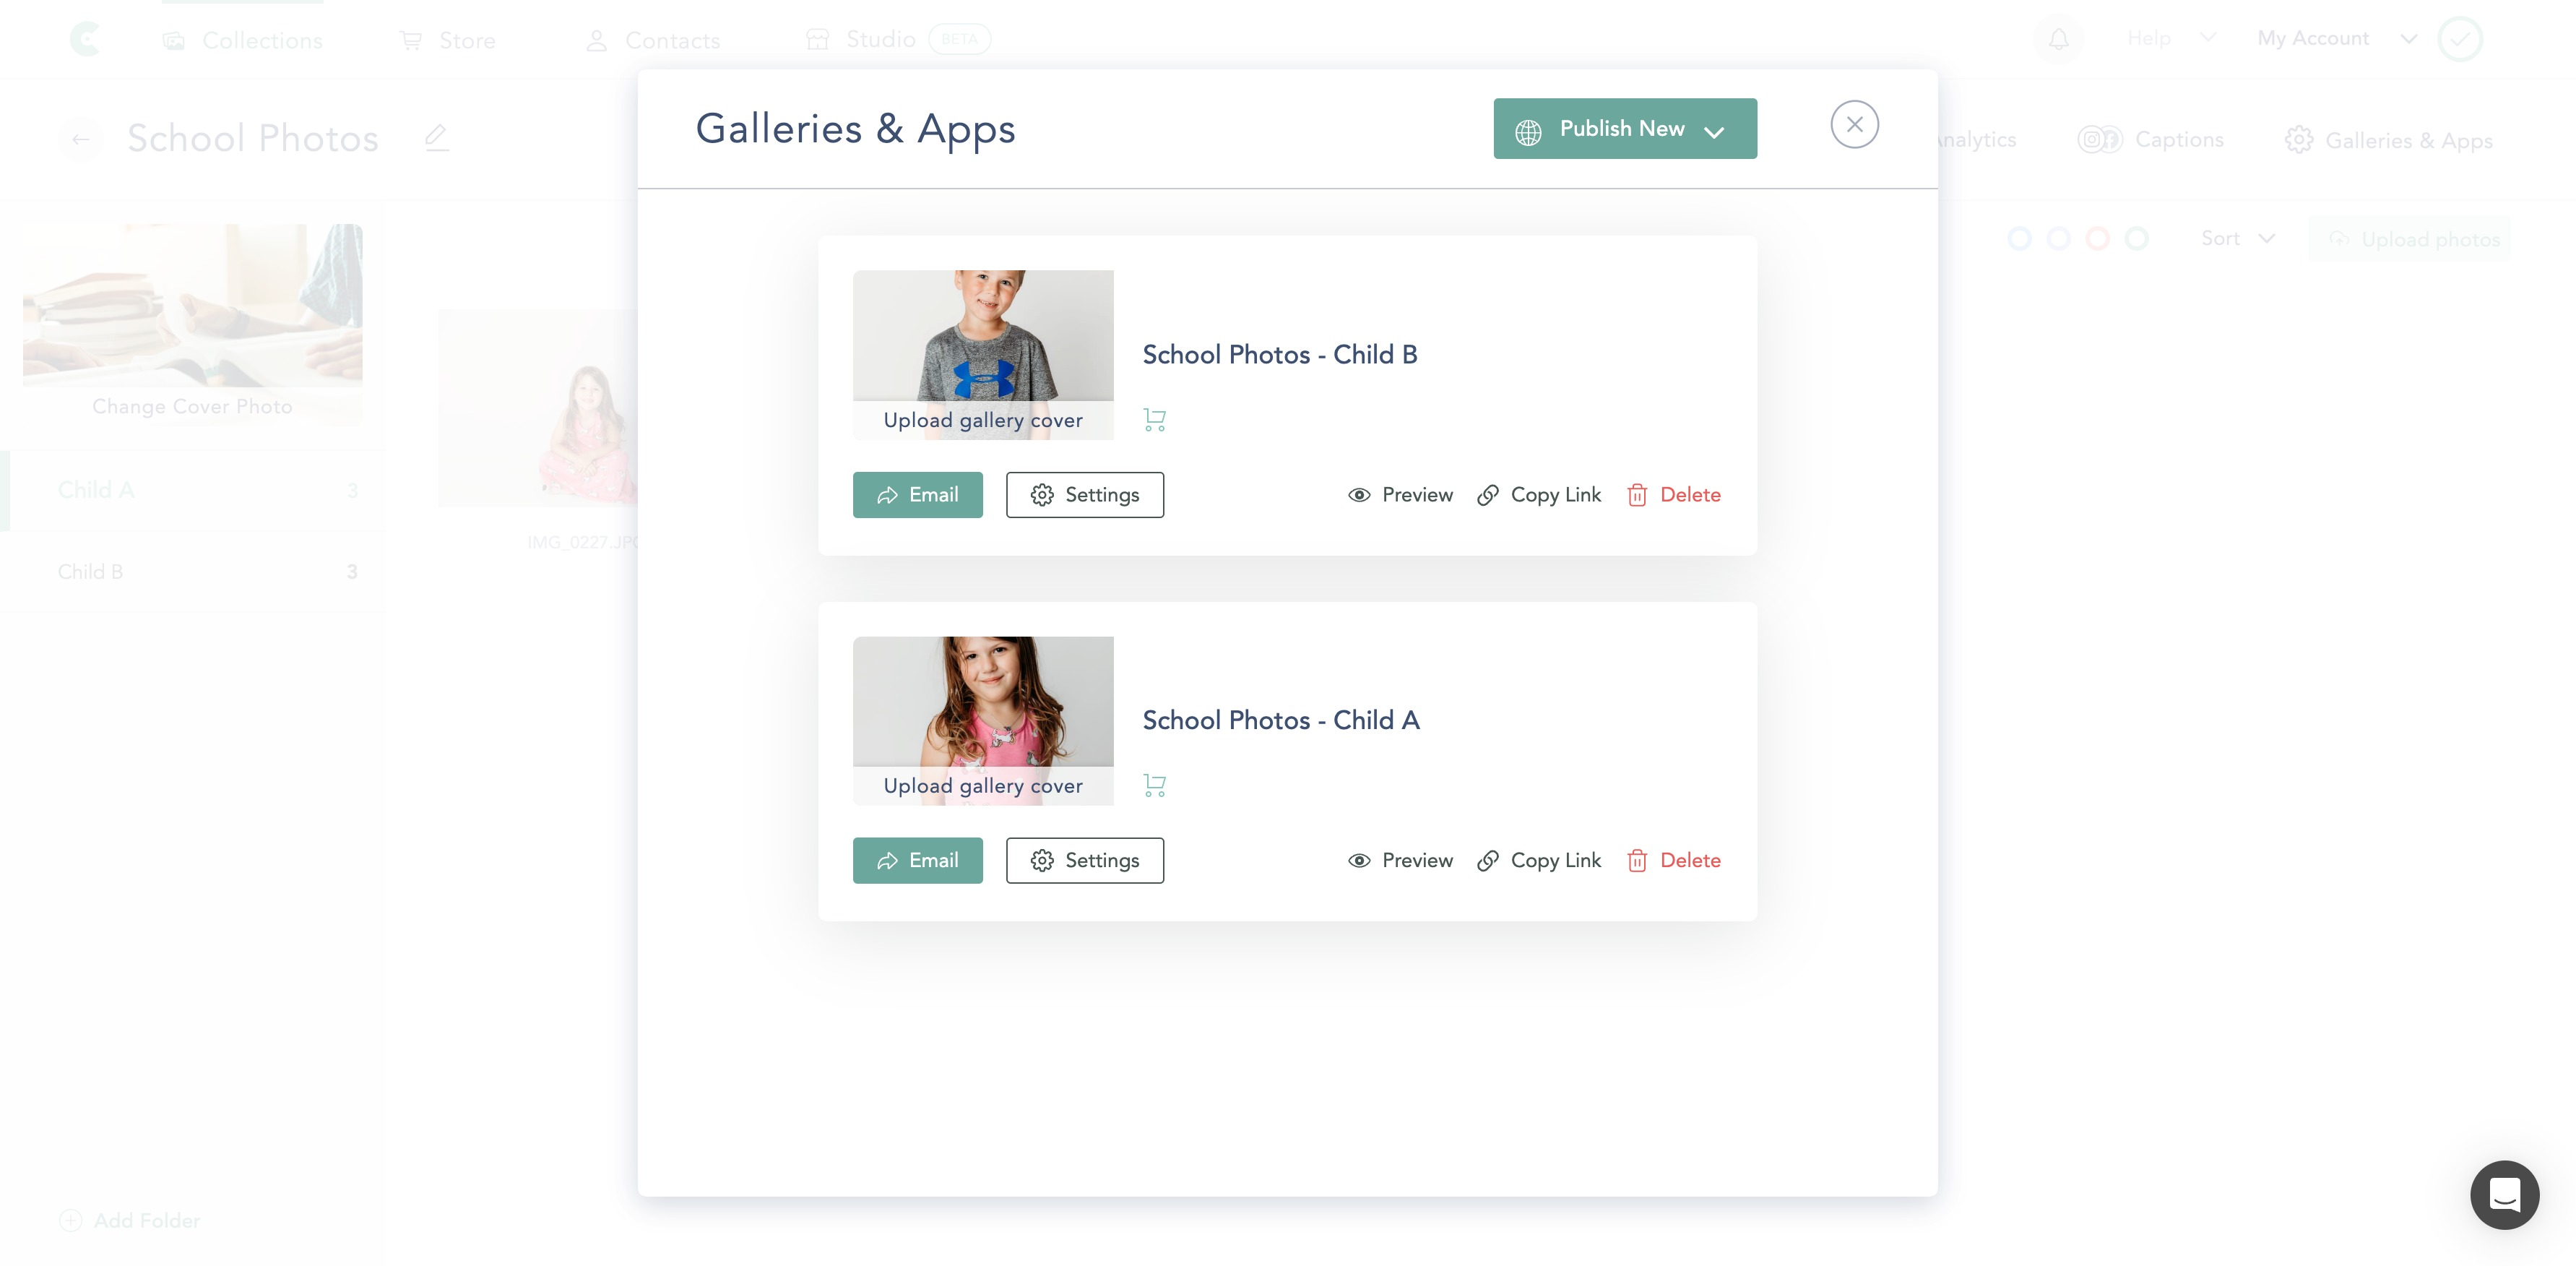
This is our go-to suggestion for anyone with privacy concerns. We recommend our photographers make one Collection for the class and then give each student their own Folder and Gallery.
You can upload all photos from a school photos session in one Collection, create a different Folder per child, move the images to each of those Folders per child, and publish child-specific galleries. If each child needs to be kept private due to school rules, we suggest this type of setup.
Need extra security?
- Password-protect the Galleries before sending them to each parent individually.
- Email Capture is also a good feature to turn on, so you know who is viewing and purchasing images by requiring an email address before the gallery can be opened.
Save time with this workflow by saving a Gallery Preset on your first published Gallery. With Gallery Presets, you can save the desired settings from the first Gallery made and apply the preset quickly to future school photo galleries.
Cover photos for each Gallery can be images of the children or your business logo.
Once all Galleries are published, you can deliver those galleries directly to the school or to individual parents via email.
One Hidden Portfolio Per Class
Another way of sharing school photos is making a Hidden Portfolio Category where each Gallery is a child's name. You would still create one Collection per session, a Folder per child, and publish a Gallery per child.
You can then assign those Galleries to the same hidden portfolio category link by adding the category to Portfolio Settings page, turning the eyeball off, and going into each Gallery Settings to assign the Galleries to that Portfolio link.
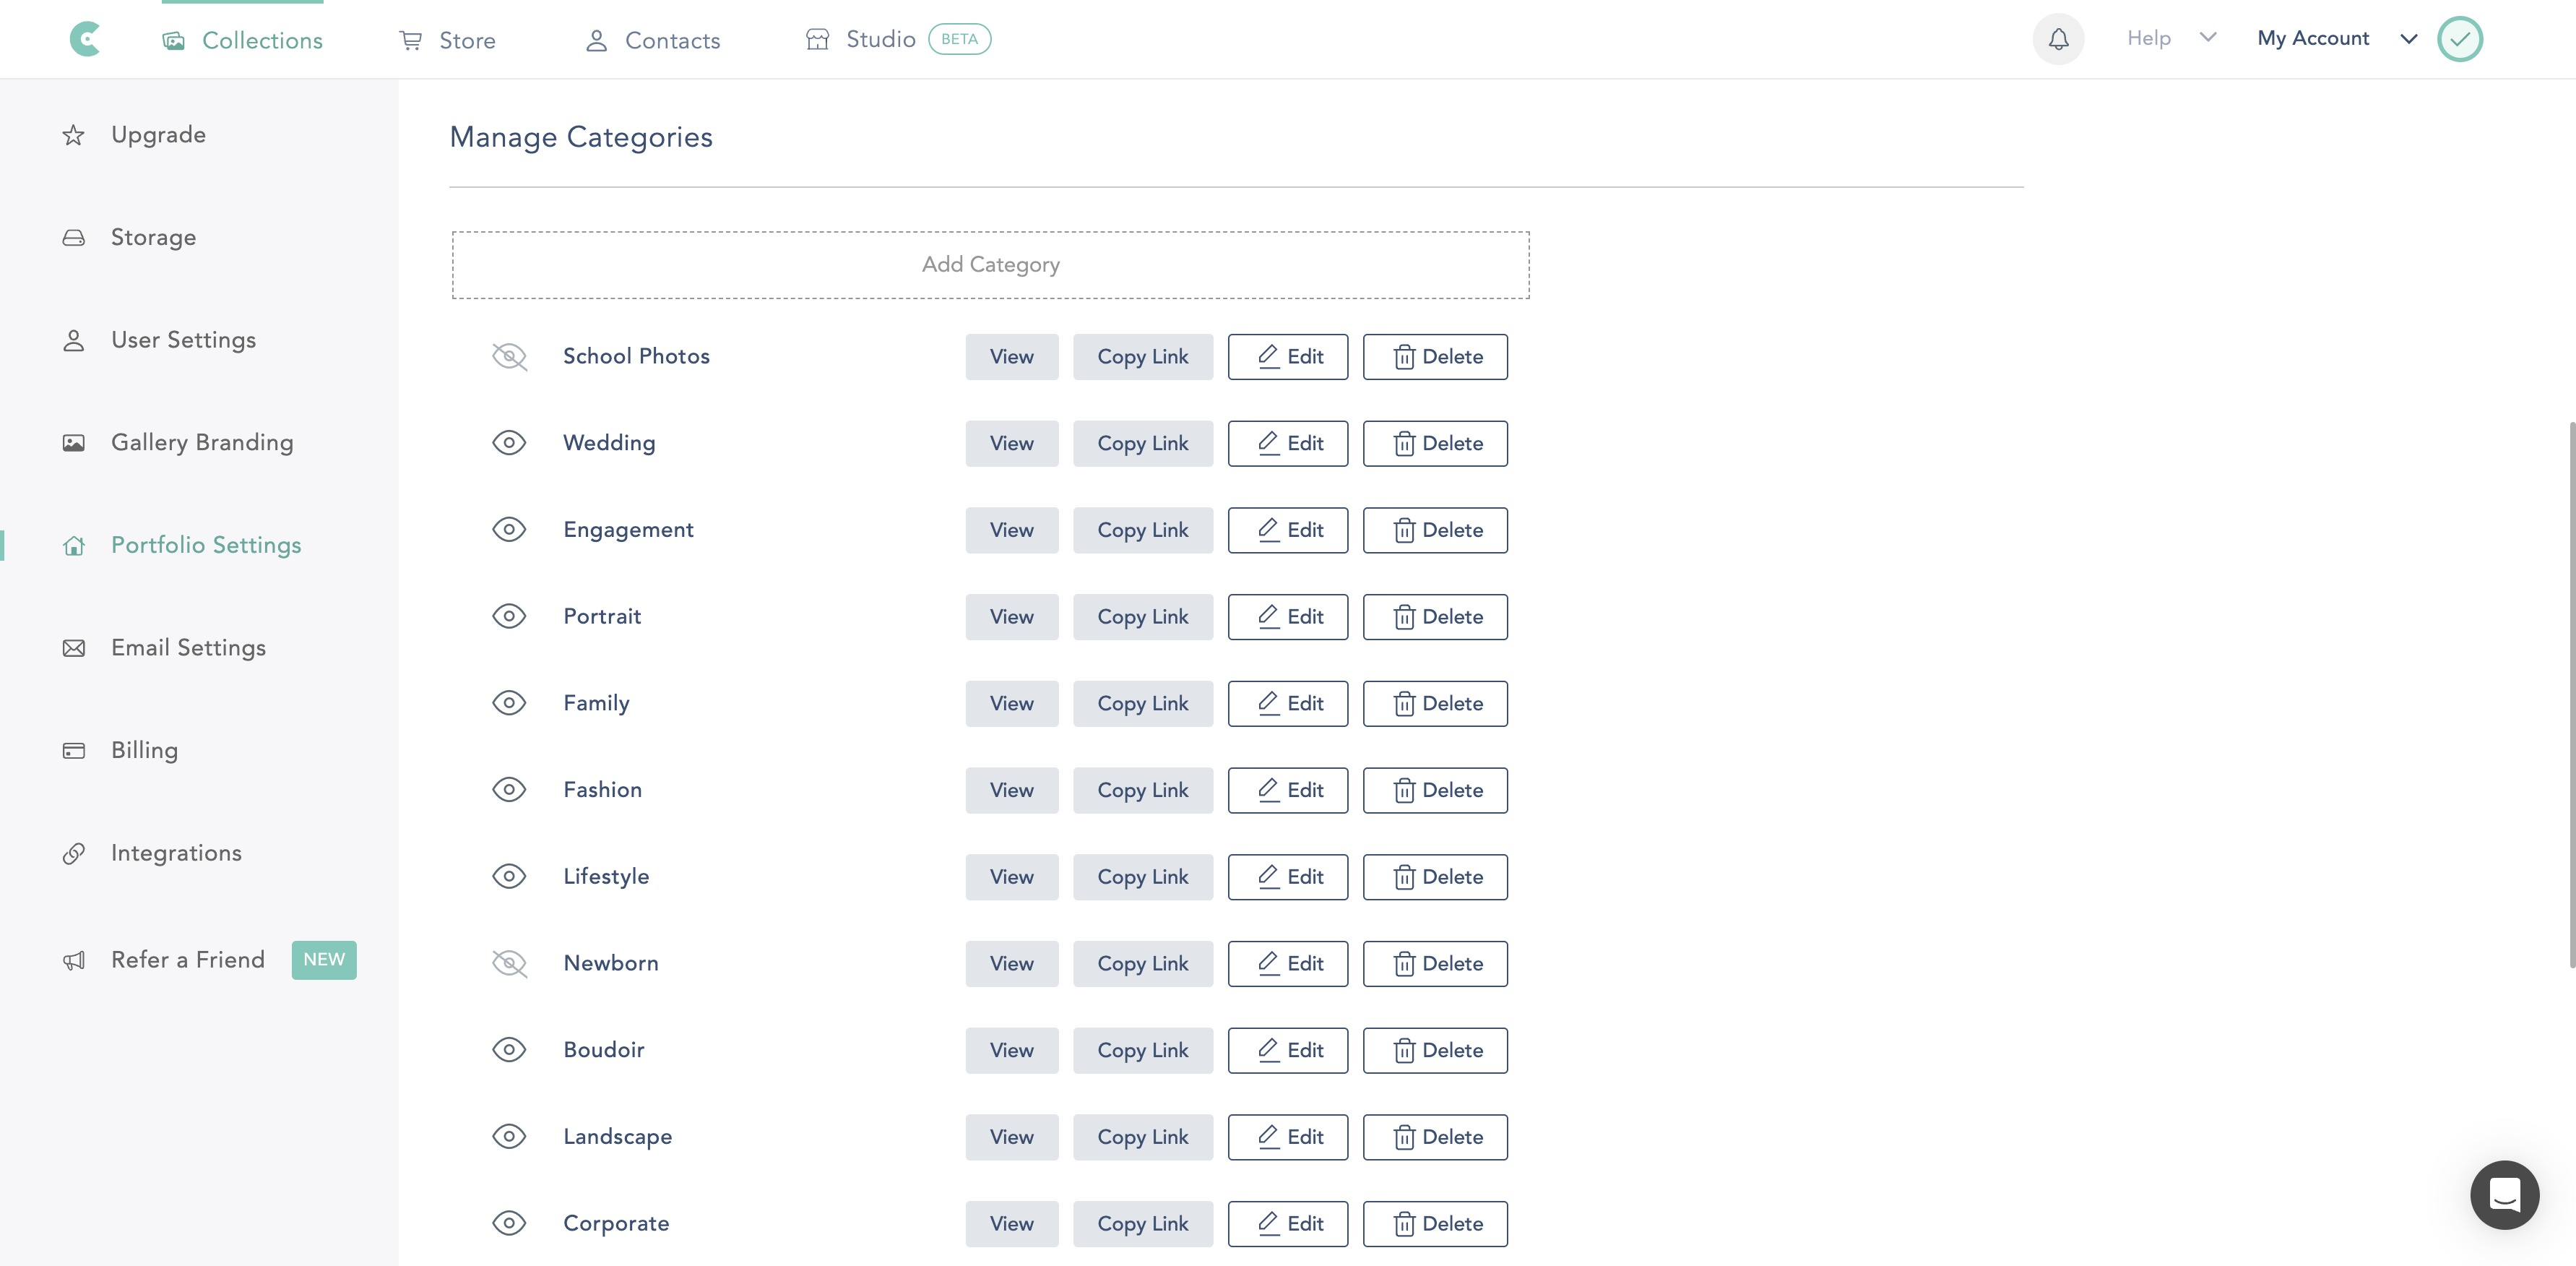
From there, just click Copy Link next to your hidden portfolio category and send that link to the school or to all parents. With this link, parents can visit their specific child's gallery to view and order photos. With a Password and/or Email Capture required on each gallery, parents won't be able to view other children's galleries without the correct password.
Set Up Your Print Store
Let's talk print sales! With whatever setup you choose from above, the next step would be to sell your photos in prints and downloads. You can set up your CloudSpot Print Store by connecting to Stripe or PayPal and offer digital and print Packages to parents.
How to Upsell Your Prints
- Set up a Catalog - After you set up your Print Store, you'll need to make a Catalog of products to offer. Add your markup to the products, and you're ready to make a sale!
- Allow for Digital Downloads - Every parent wants to download the photos of their children. By setting up digital downloads in your Catalog, you'll be able to offer full-resolution and social media size downloads. Pro tip: Make sure you turn on your Watermarks when sending the gallery to avoid screenshots.
- Offer Packages - Add digital downloads, select print sizes, a canvas, an album, etc to a package so your parents get the best bang for their buck.
- Create a Discount Code - This is the best way to entice your clients to purchase a product. Having a discount code of $50 off a package is like having a $50 bill in hand and your parents will want to use it. Ensure your package prices are over $50, and you are guaranteed to make a profit.
- Share your Gallery or Portfolio - Once your Store, Catalog, and products are set up, send your client(s) the gallery or portfolio link to share the photos and start selling digital downloads and prints.
How to Offer Offline Prints
Maybe you are collecting for a charity and looking to sell photos in person and not through CloudSpot. We have a workflow for you. Send your gallery or portfolio link with the Store turned off and have your parents select Favorites by clicking the heart on the photos they want to be printed. Once they are done selecting Favorites, they can click "Alert Photographer" to email you which photos they are looking to purchase.
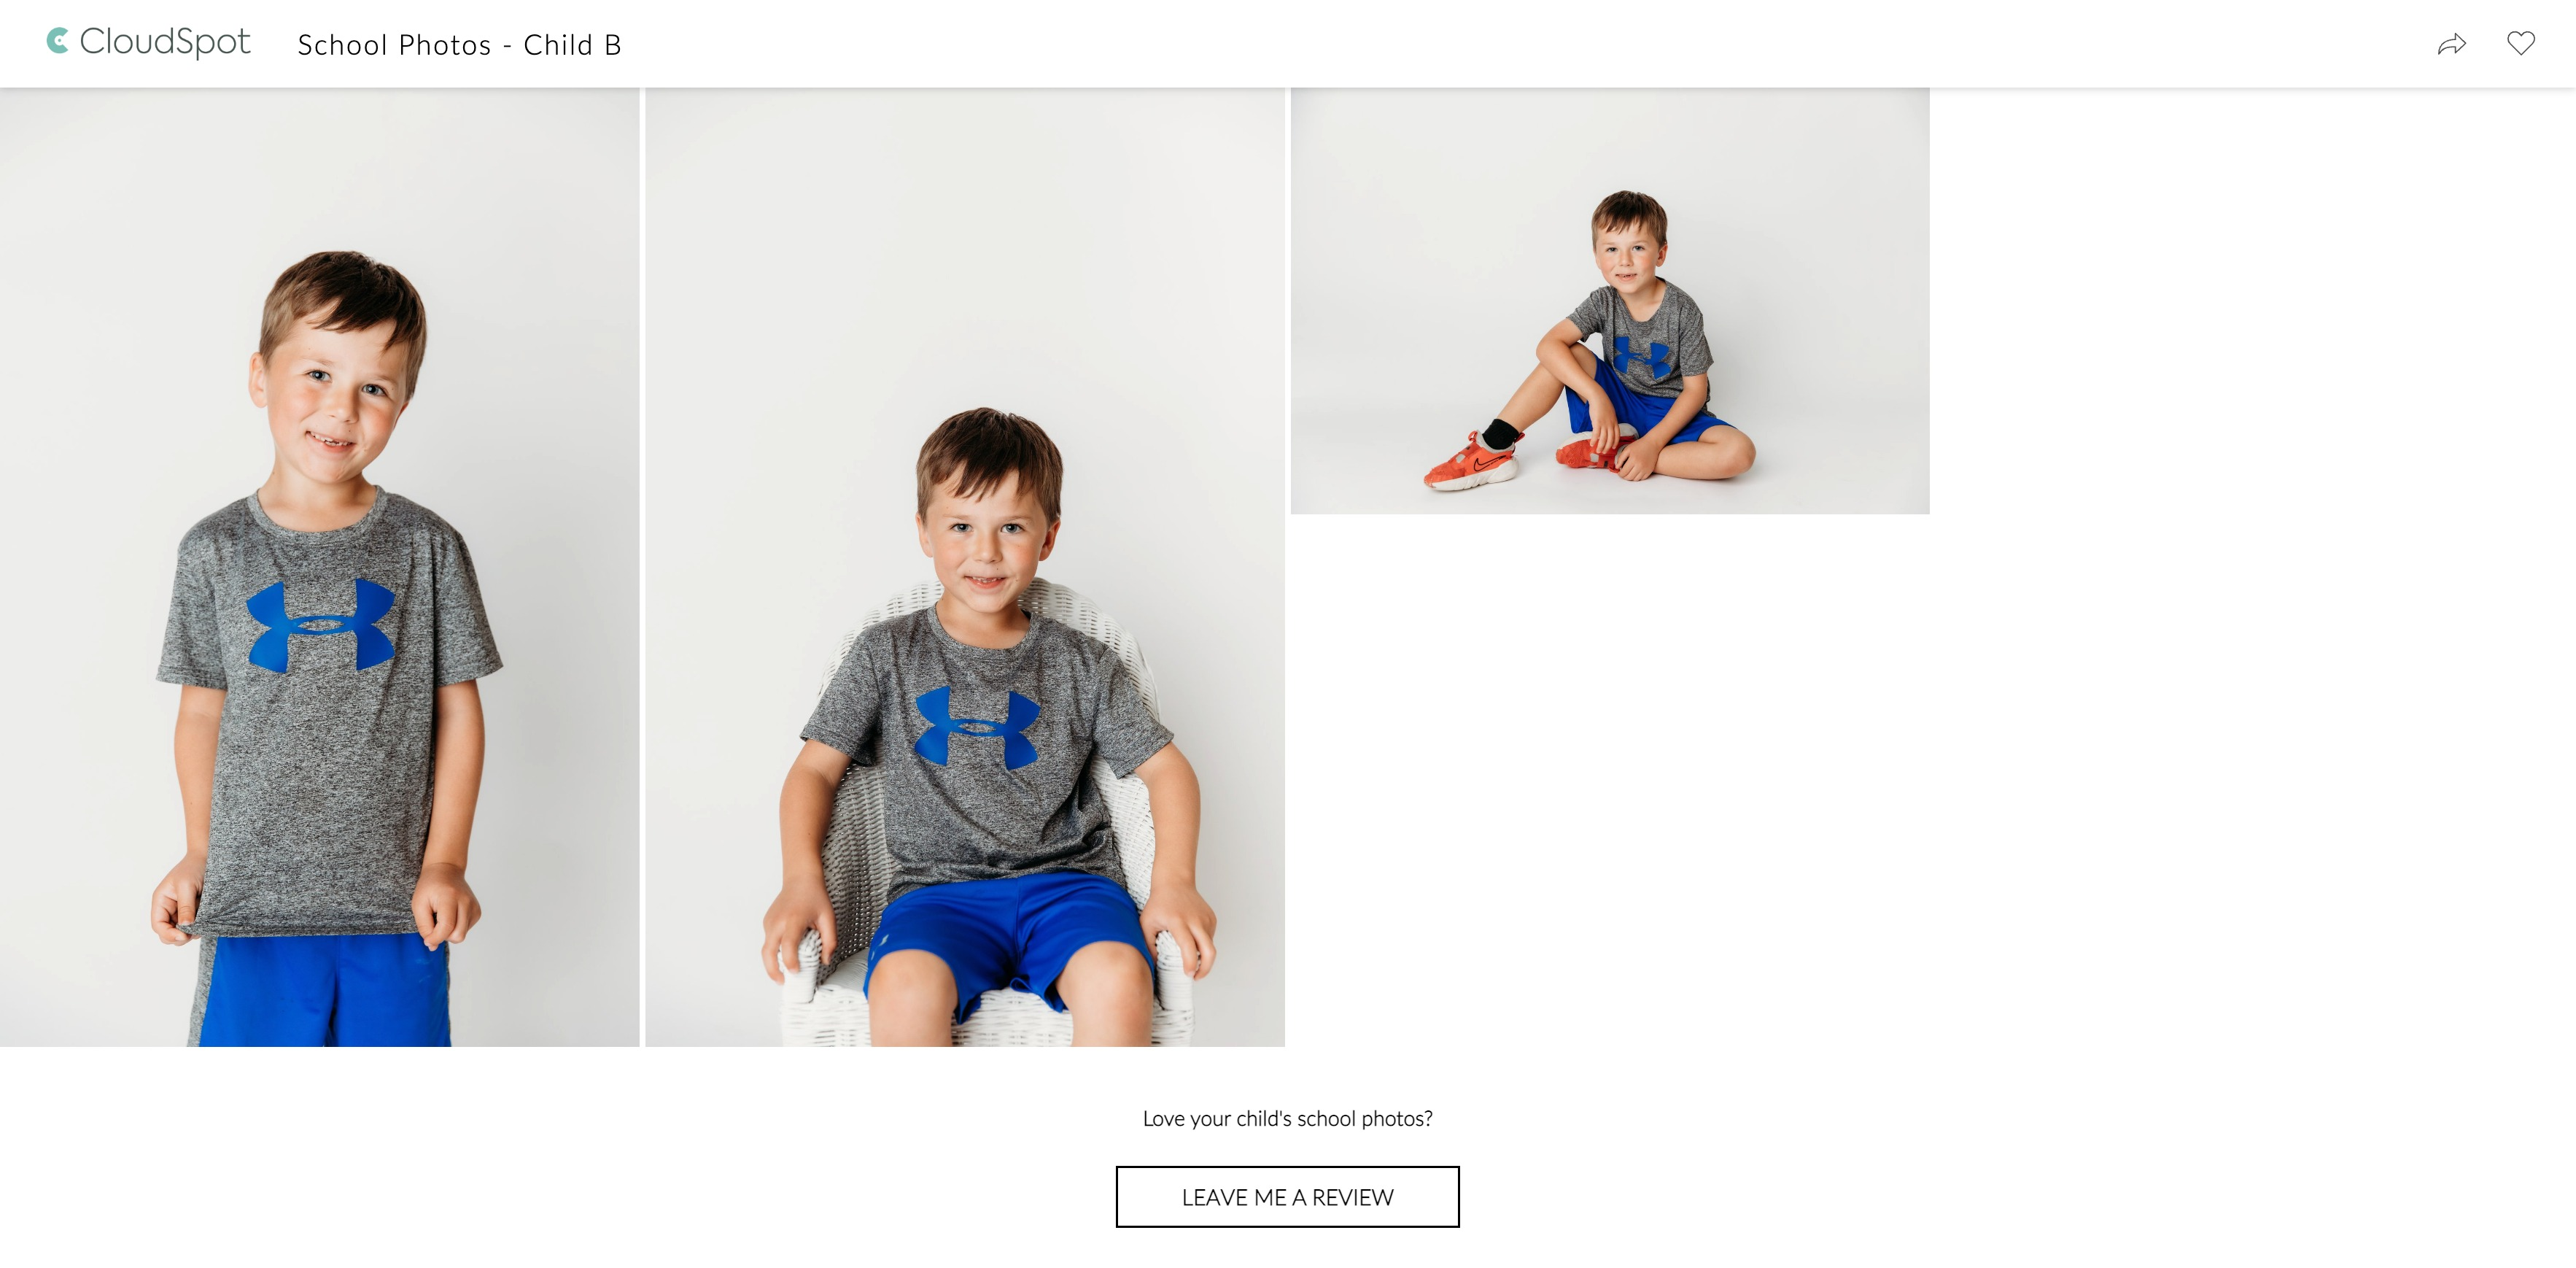
Call-to-Action Button
Looking for post-session reviews? Add a Call-to-Action in your Gallery Settings and save this as a Gallery Preset so it displays at the bottom of your school photo galleries!
Now that your Collections, Galleries, and Stores are set up for school photo success, we cannot wait to see your business grow and thrive! 🌱

.png)


%20(1).avif)


